A dimension is a predefined category used by companies to organize and analyze their expenses, providing a detailed breakdown of costs. For example, dimensions could include the categorization of employees into dimensions such as legal entity or by manager.
To create a Dimension
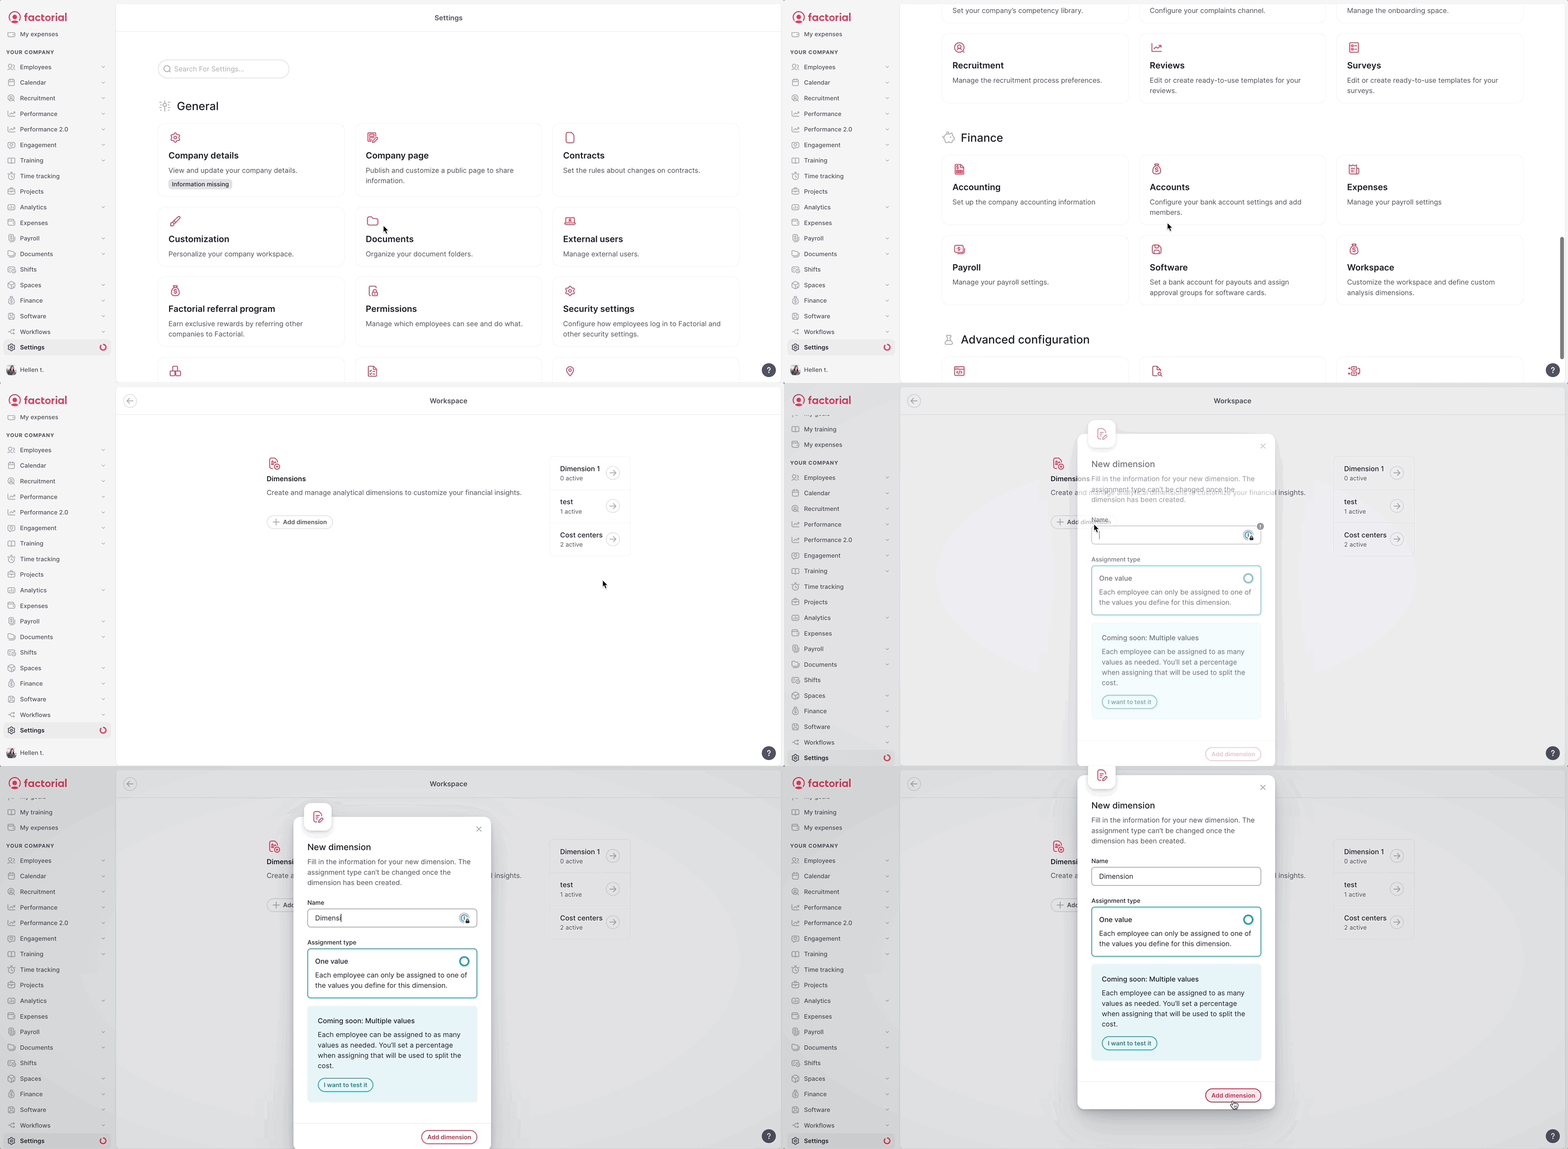
- On your sidebar, go to Settings
- Scroll down to Finance
- Select Workspace
- Click on Add dimension
- Fill in the information and choose the assignment type:
- One value: each employee can only be assigned to one of the values you define
- Coming soon - Multiple values: each employee can be assigned to as many values as needed. You’ll set a percentage when assigning that will be used to split the cost.
- Click on Add dimension

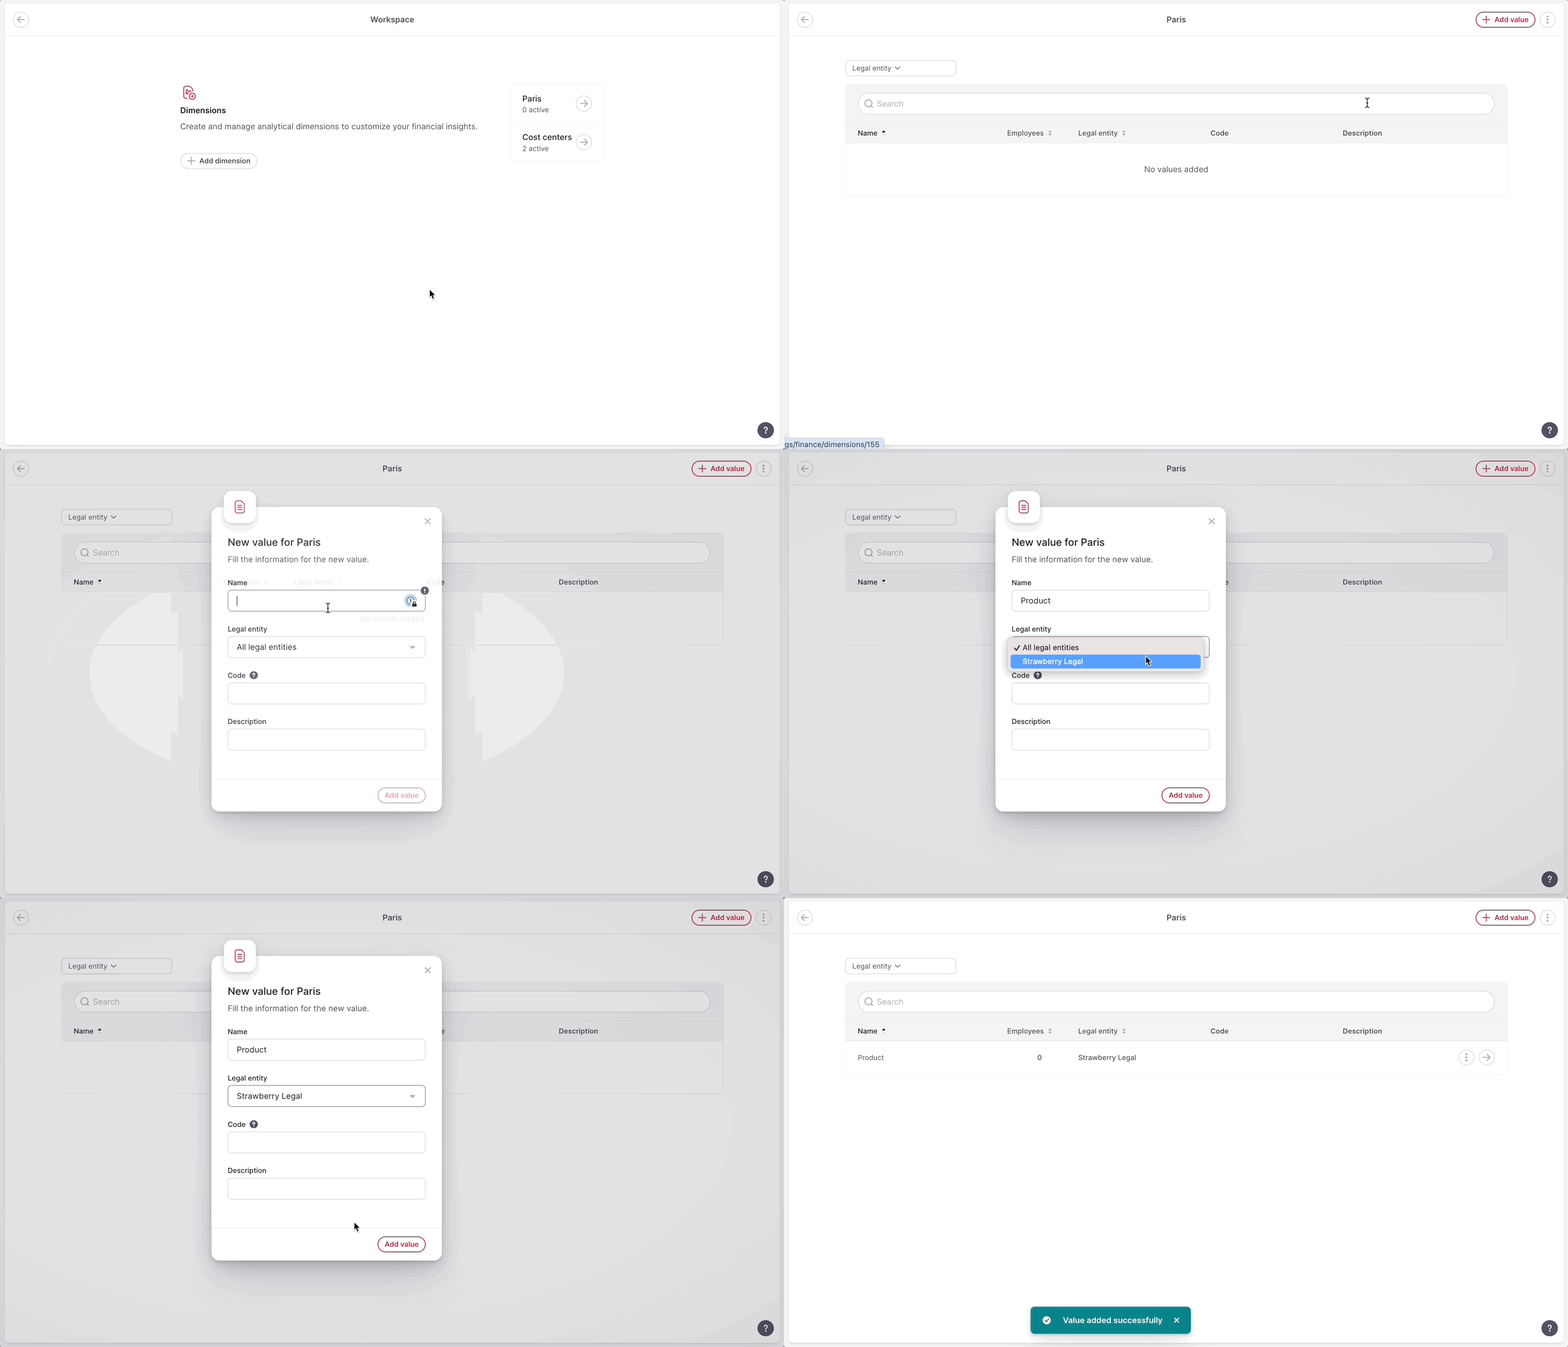
To create dimension values
- On the Workspace page, open the dimension
- Click on Add value - in the upper right corner
- Fill in the information. There are two mandatory fields: name and legal entity
- Click on Add value

Dimension assignment
You can assign dimensions to employees in two ways: by assigning employees in bulk, or by assigning employees manually.
Assign employees in bulk
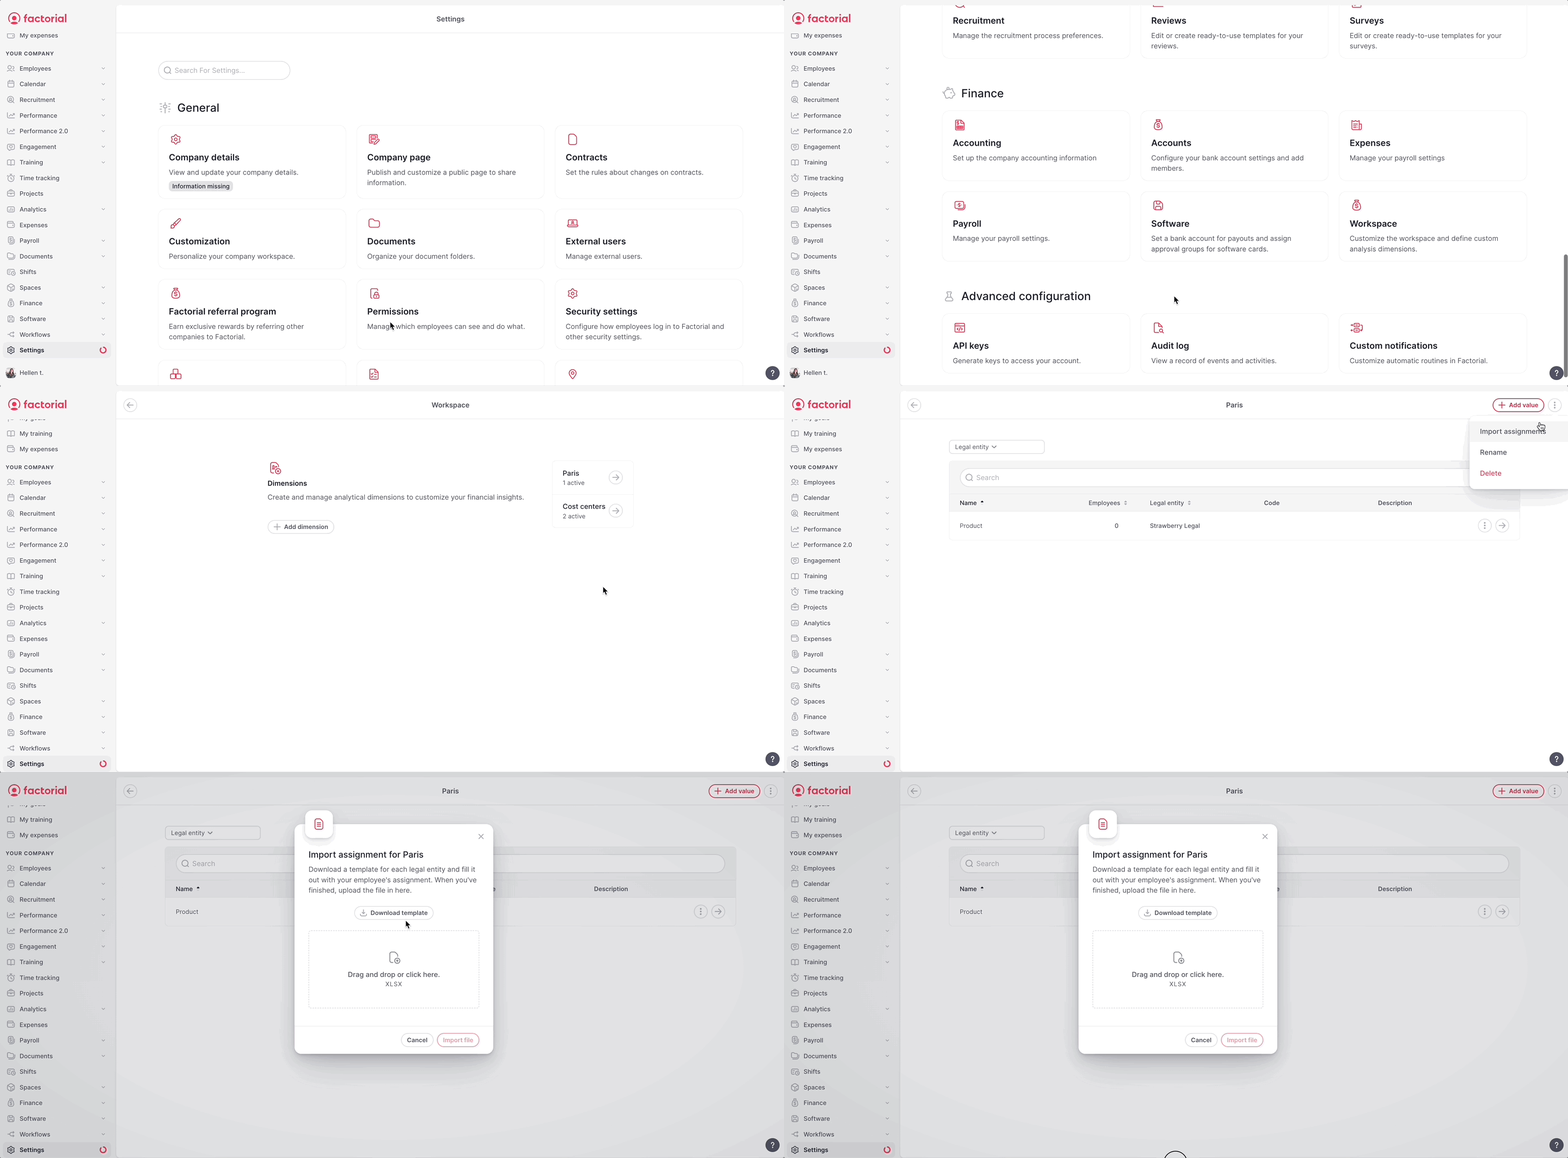
- On your sidebar, go to Settings
- Scroll down to Finance
- Select Workspace
- Click on the arrow next to the Dimension
- Click on the 3 dots (top right)
- Select Import assignments
- Download the template and fill it out with your employee's dimension assignment. When you've finished, upload the file.

Assign employees manually
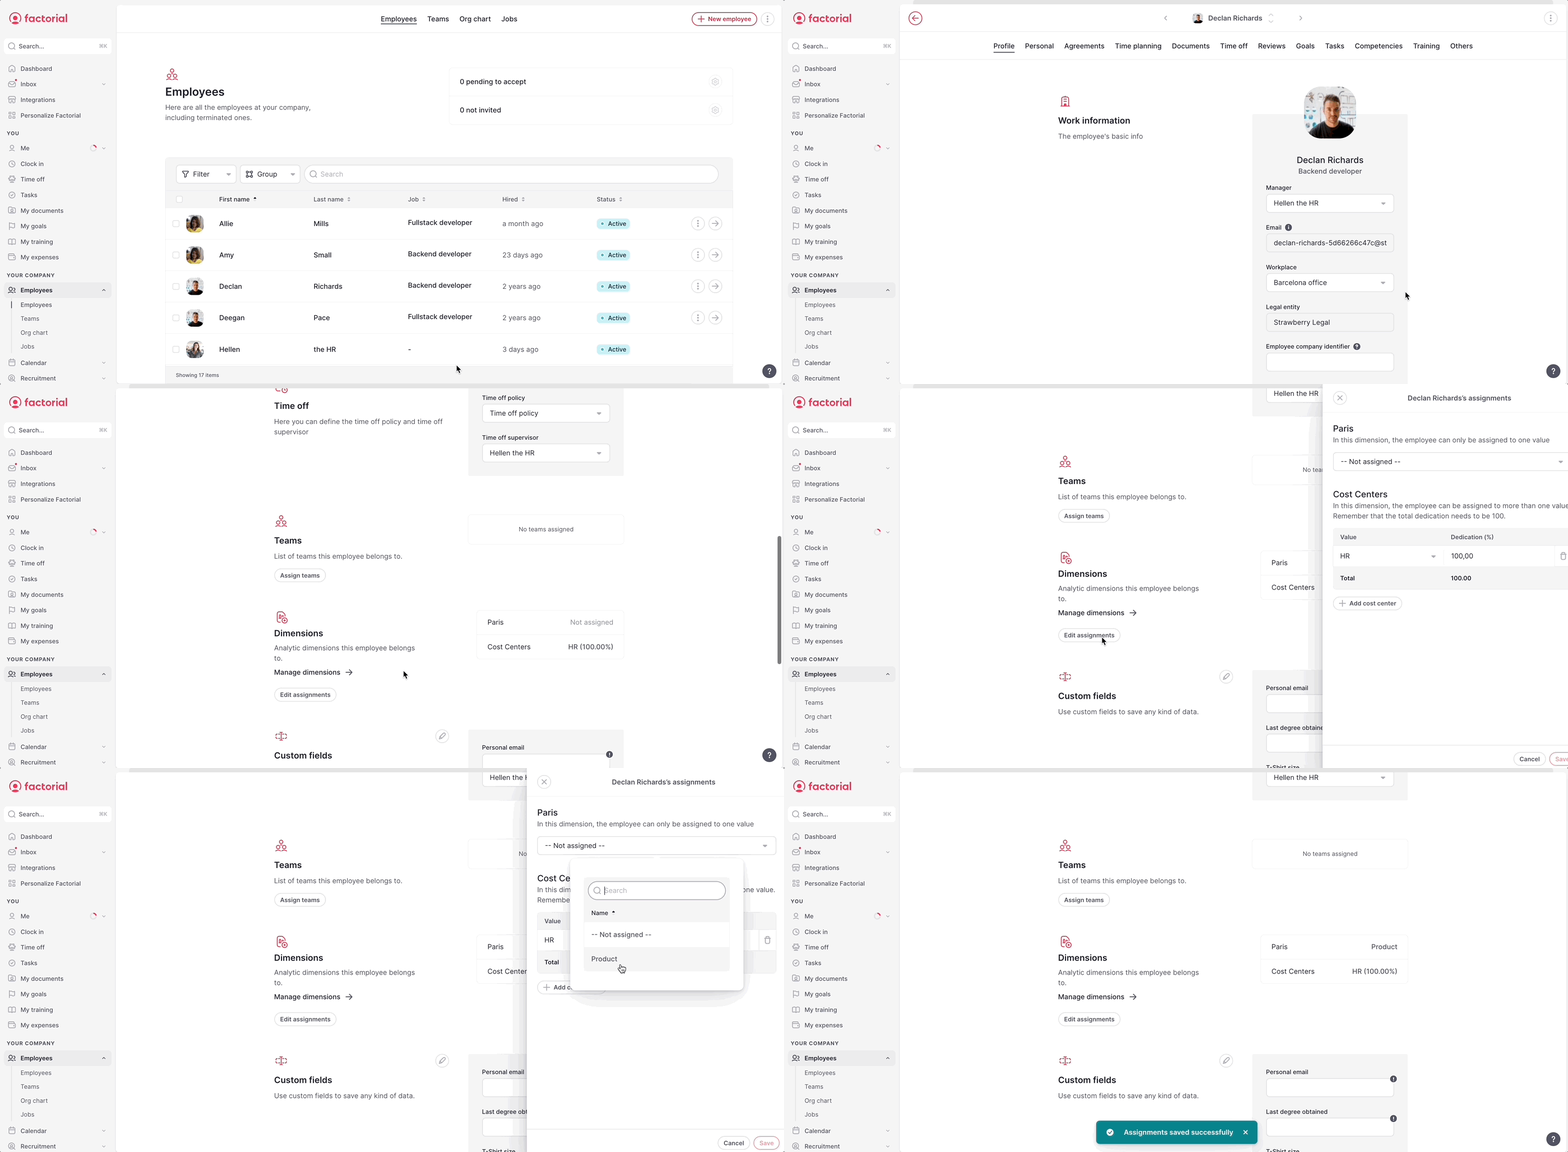
- On your sidebar, go to Employees
- Select the employee you want to assign the cost center
- In the Profile tab, scroll down to Dimensions
- Click on Edit assignments
- Assign the value for the dimension
- Click on Save

To delete or rename a dimension
- Open the dimension row you want to rename or delete
- Click on the 3 dots icon - in the upper right corner
- Select Delete or Rename

To delete or edit a value
- Get to the value row you want to edit or delete
- Click on the 3 dots icon
- Select Delete or Edit details
