With this functionality you'll be able to set up designated spaces that can be easily booked by your employees, ensuring efficient utilization of your workspace.
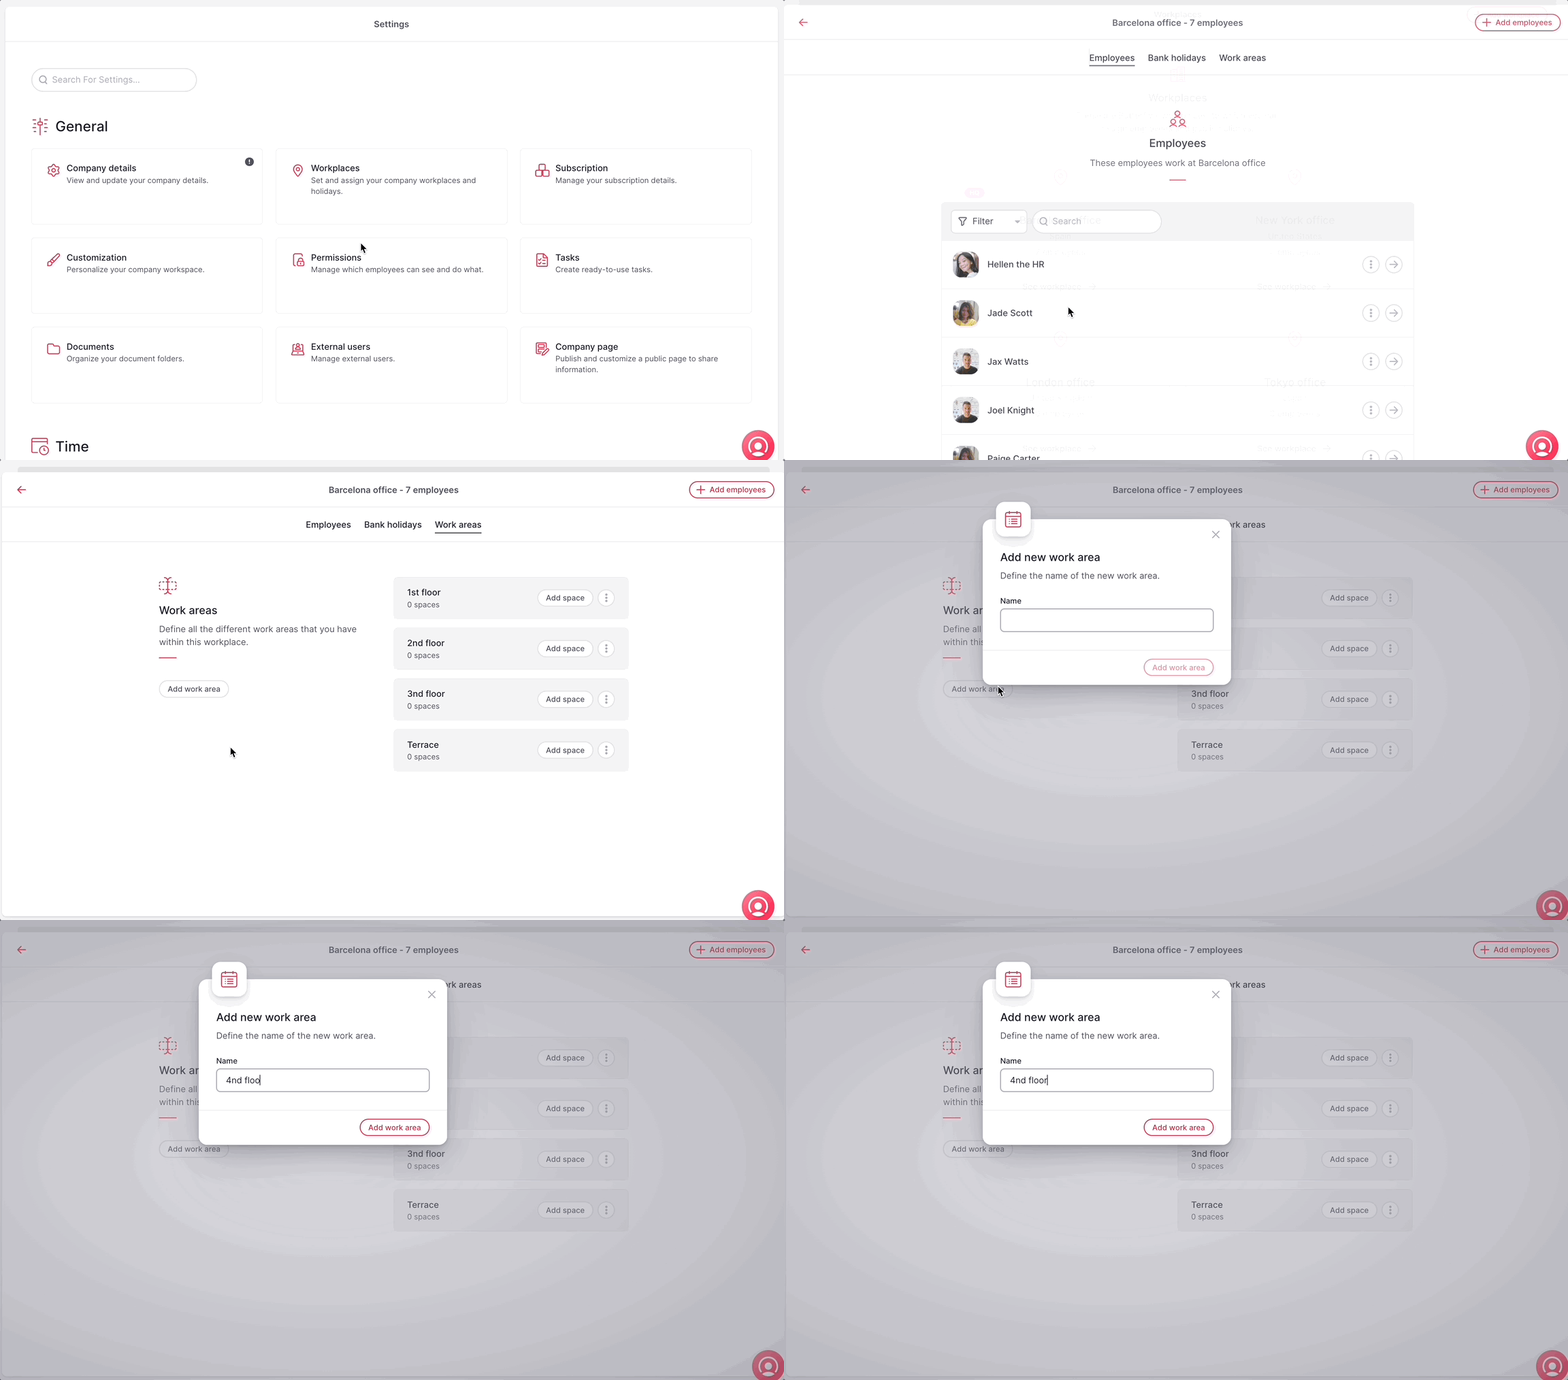
How to create work areas
- On your sidebar, go to Settings
- In General, click on Workplaces
- Click on See workplace to open a workplace
- Open the Work areas tab
- Click on Add work area

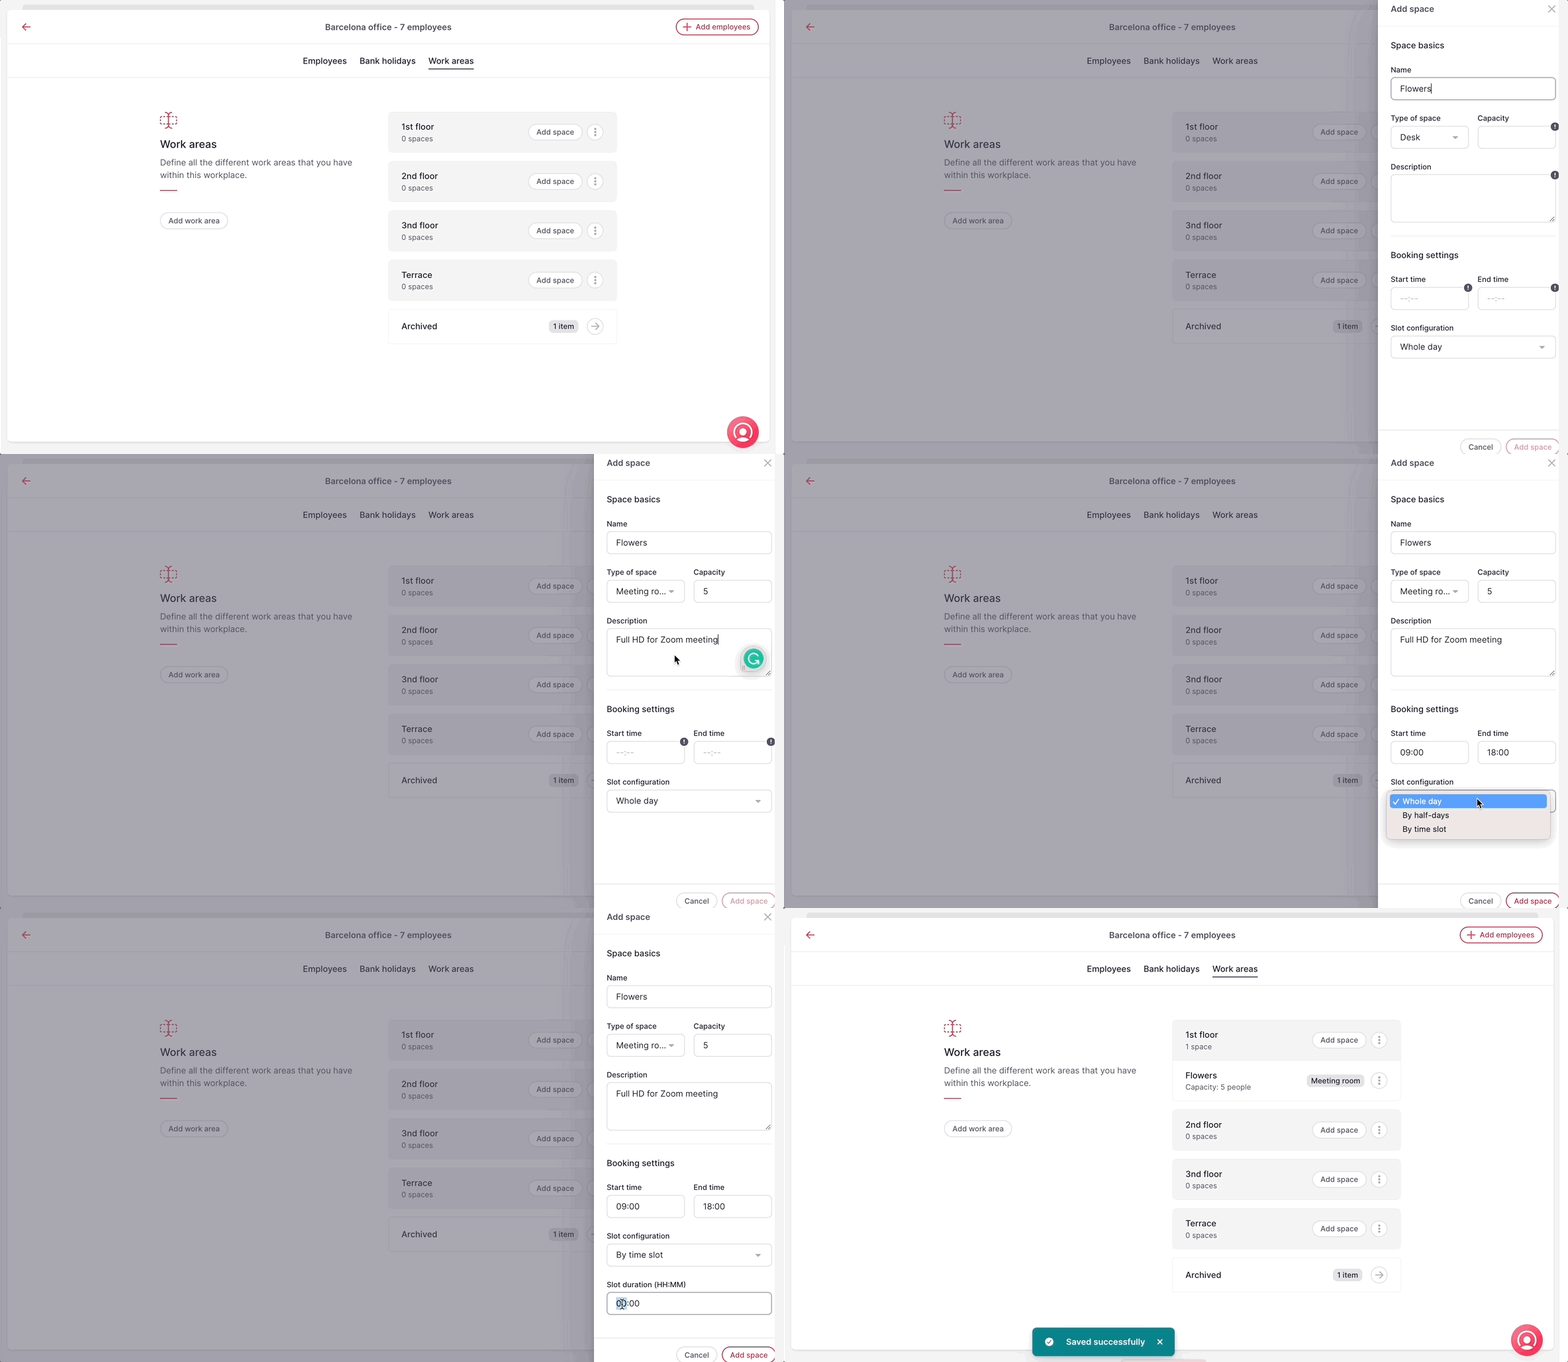
How to create spaces within a work area
- Choose the area where you want to add a space and click on Add space
- Enter a Name
- Select the Type of space:
- Desk
- Meeting room
- Booth
- Lunch area
- Parking
- Other
- Specify the Capacity
- Add a Description (here you can enter the amenities of the space)
- Define the Booking settings:
- Start and end time
- Slot configuration: define whether the space is bookable for the whole day, half day, or by time slot.
- Click on Add space

Spaces permissions
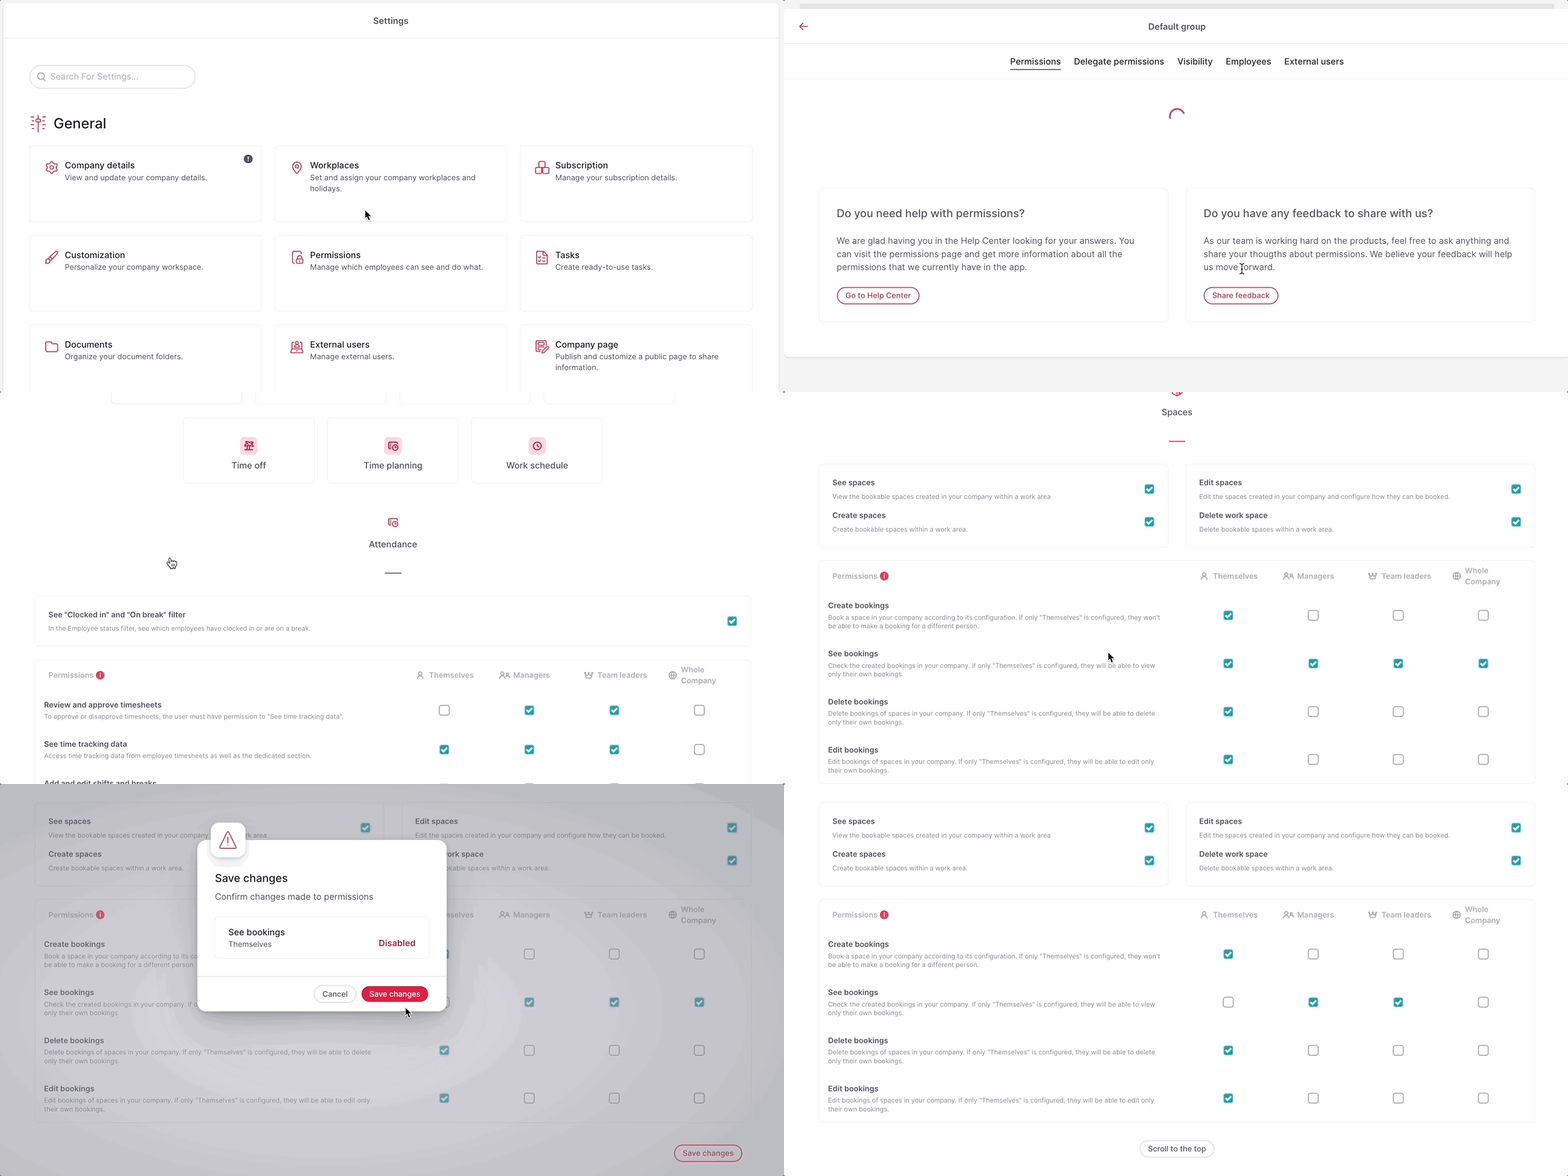
You can define the permissions for seeing, creating, editing, and deleting workspaces as well as managing bookings. This allows you to control who has the authority to perform these actions within your organization.
- On your sidebar, go to Settings
- In General, click on Permissions
- Select the Permission group
- Click on Spaces
- Enable/disable permissions
- Click on Save changes

Once you have created bookable spaces, users within your organization will be able to view and book these spaces according to the defined booking options.