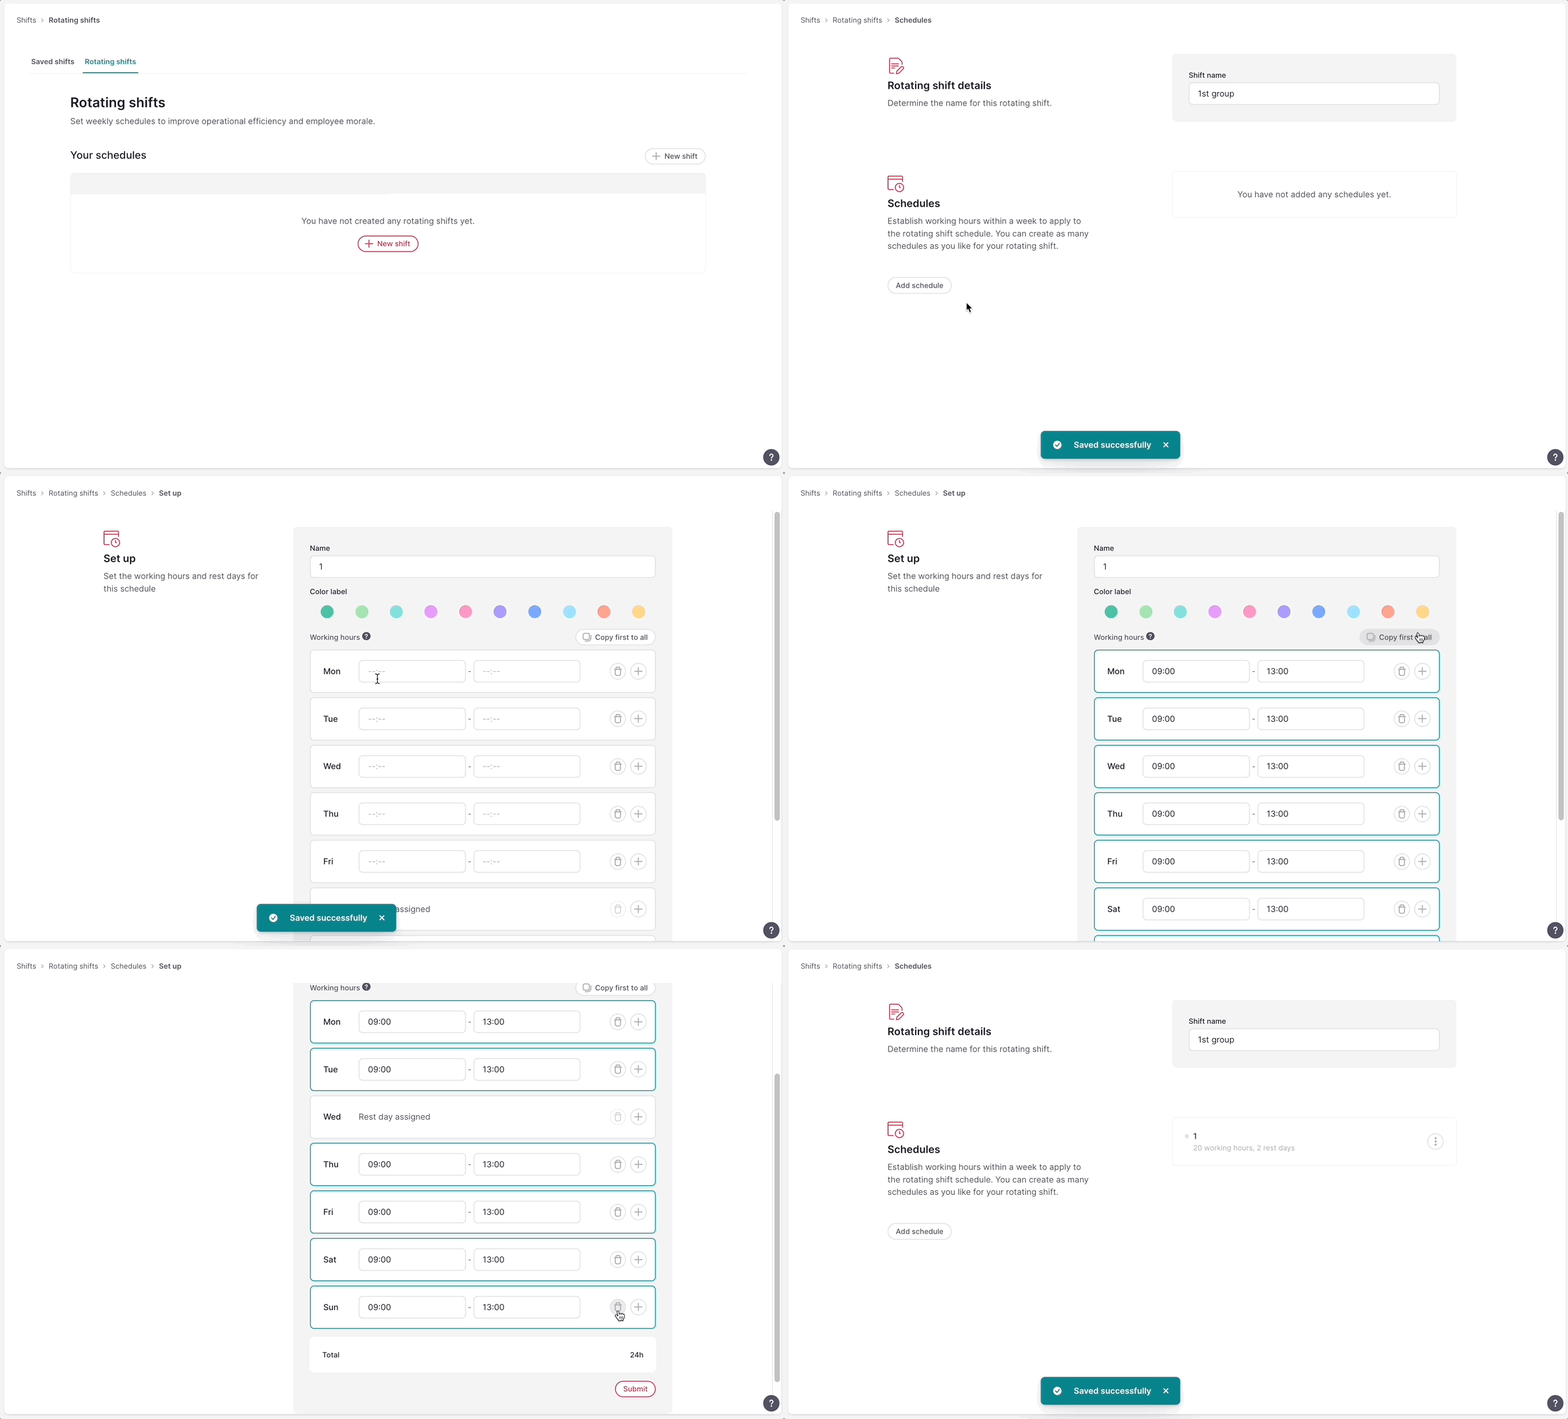
Rotating shifts are ideal for managing traditional shifts that follow specific patterns, which can be weekly or bi-weekly, and once the entire pattern is covered, it repeats in a continuous loop. This type of shift management is particularly helpful for planning and scheduling purposes.
Where to find rotating shifts
- On your sidebar, go to Shifts
- Click on the three dots icon - in the upper right corner
- Click on Shift settings
- Navigate to the Rotating shifts tab

How to create rotating shifts
- Click on + New shift
- Add a Shift name
- Click on Add schedule
- Give this schedule a name to help you easily identify it
- Next
- Choose a color label
- Set the shift working hours:
- To add multiple shift periods during a day click the + button
- To add a rest day click on + and select Add rest day
- To have an empty day leave the day empty
- Click on Submit

You can create as many schedules as you like for your rotating shift.
How to add breaks to rotating shifts
Ensure that you have already defined the break configurations for your company in the Time settings section.
- Open the Schedule of your rotating shift
- Place the cursor on the shift in which you want to add a break and click on the three dots icon → Add break
- Select the break from the list
- Decide if it is:
- Flexible: allowing the break at any time during a shift and decide the duration
- Semi-flexible: allowing the break within a specified time frame and decide the duration
- Fixed: allowing the break for a specific time and duration
- Click on Add break
- Complete the configuration based on the choice above

How to assign rotating shifts
- On your sidebar, go to Shifts
- Click on +
- Choose Add rotating shift
- Select the Rotating shift
- Select the schedule for which you want to start
- Select the Time period
- Choose the Workplace and the Work area
- If needed, add comments
- Select the employees
- Click on Add

Remember to publish the schedule in order to make it visible to employees.
