This article explains the newly updated version of Factorial's payroll cycle. If you're still using the old version, check out the article How to manage payroll results v1
How to import payroll results?
- Head to the Payroll app located on the side menu
- Select Cycles
- Click on the three dots icon - located in the upper right corner
- Select Change status
- Choose Results and Payments and click on Change status
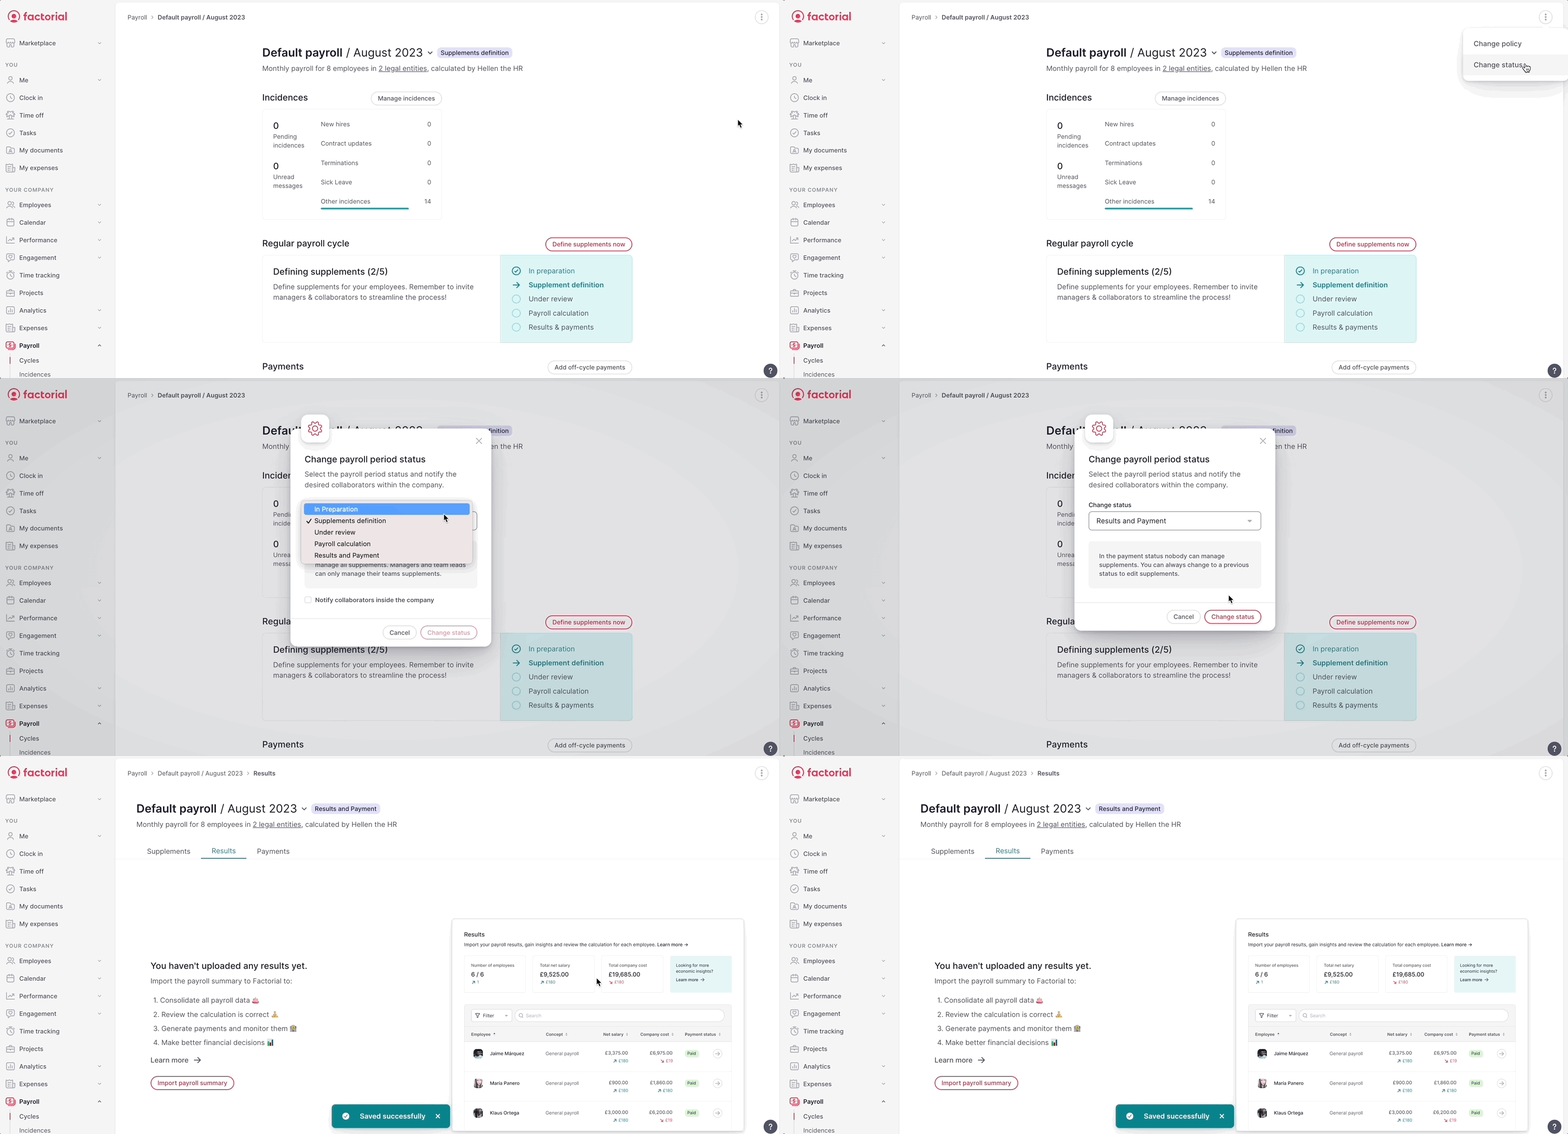
6. Click on Import payroll summary
7. Upload your file (.xlsx)
8. And again, click Import payroll summary
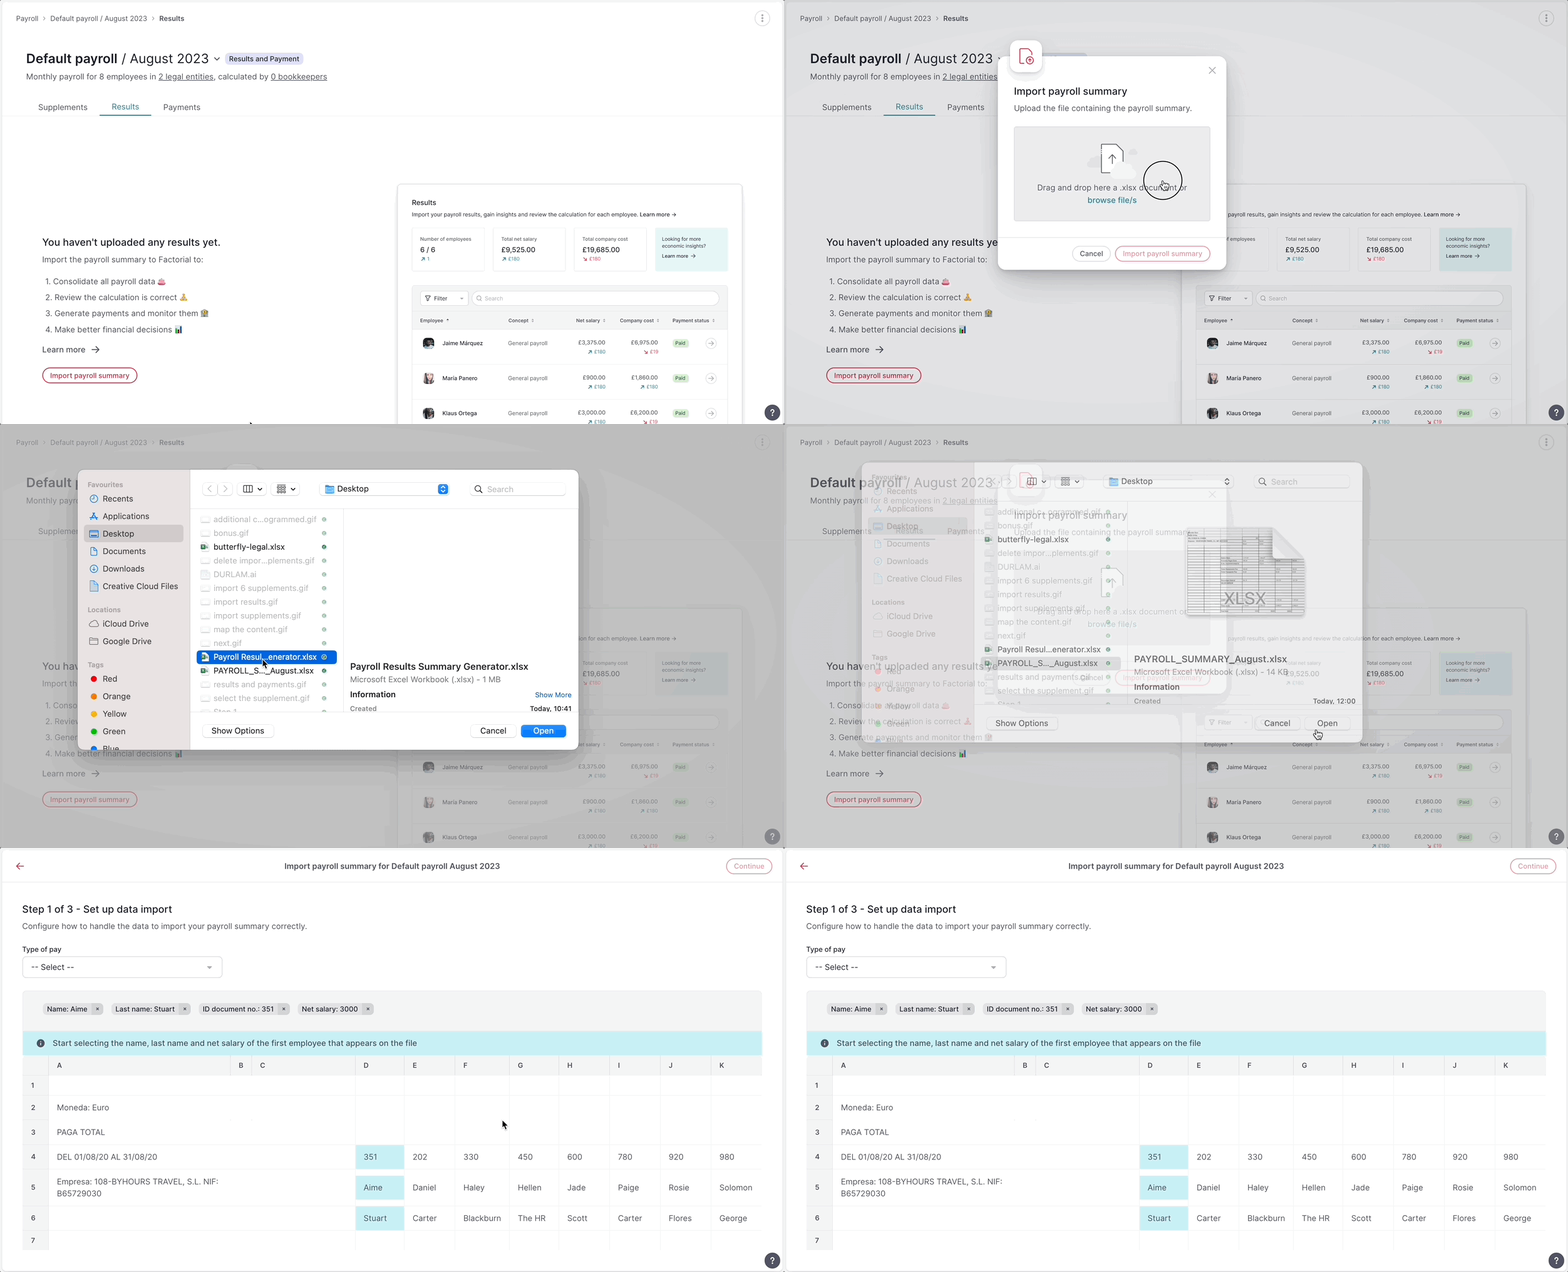
💡Once you have imported your payroll summary it is time to set up the data imported so that document can be read correctly.
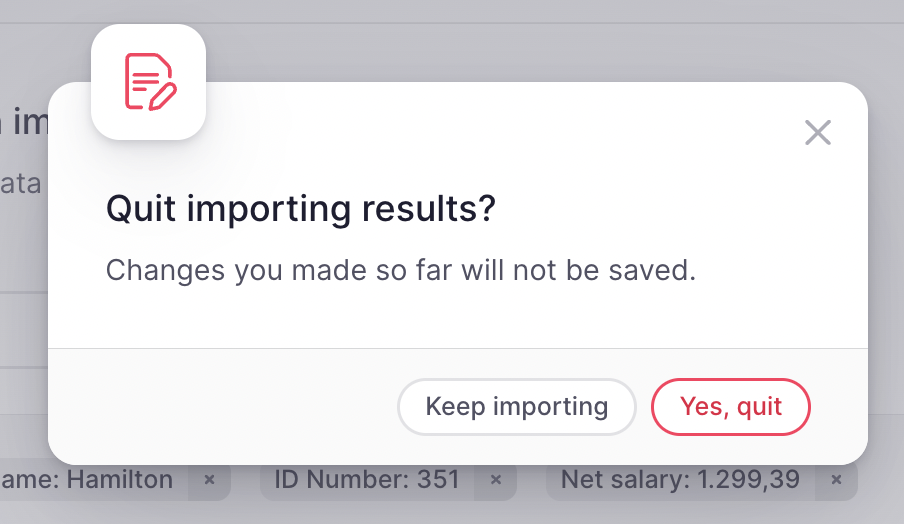
❗If you click on the back button or click in any item in the menu a confirmation modal to leave the process will appear, in this way you don’t loose the advance by mistake.
Steps to follow:
Now that you have already imported your payroll summary, you will be guided to follow 3 steps to finish the process
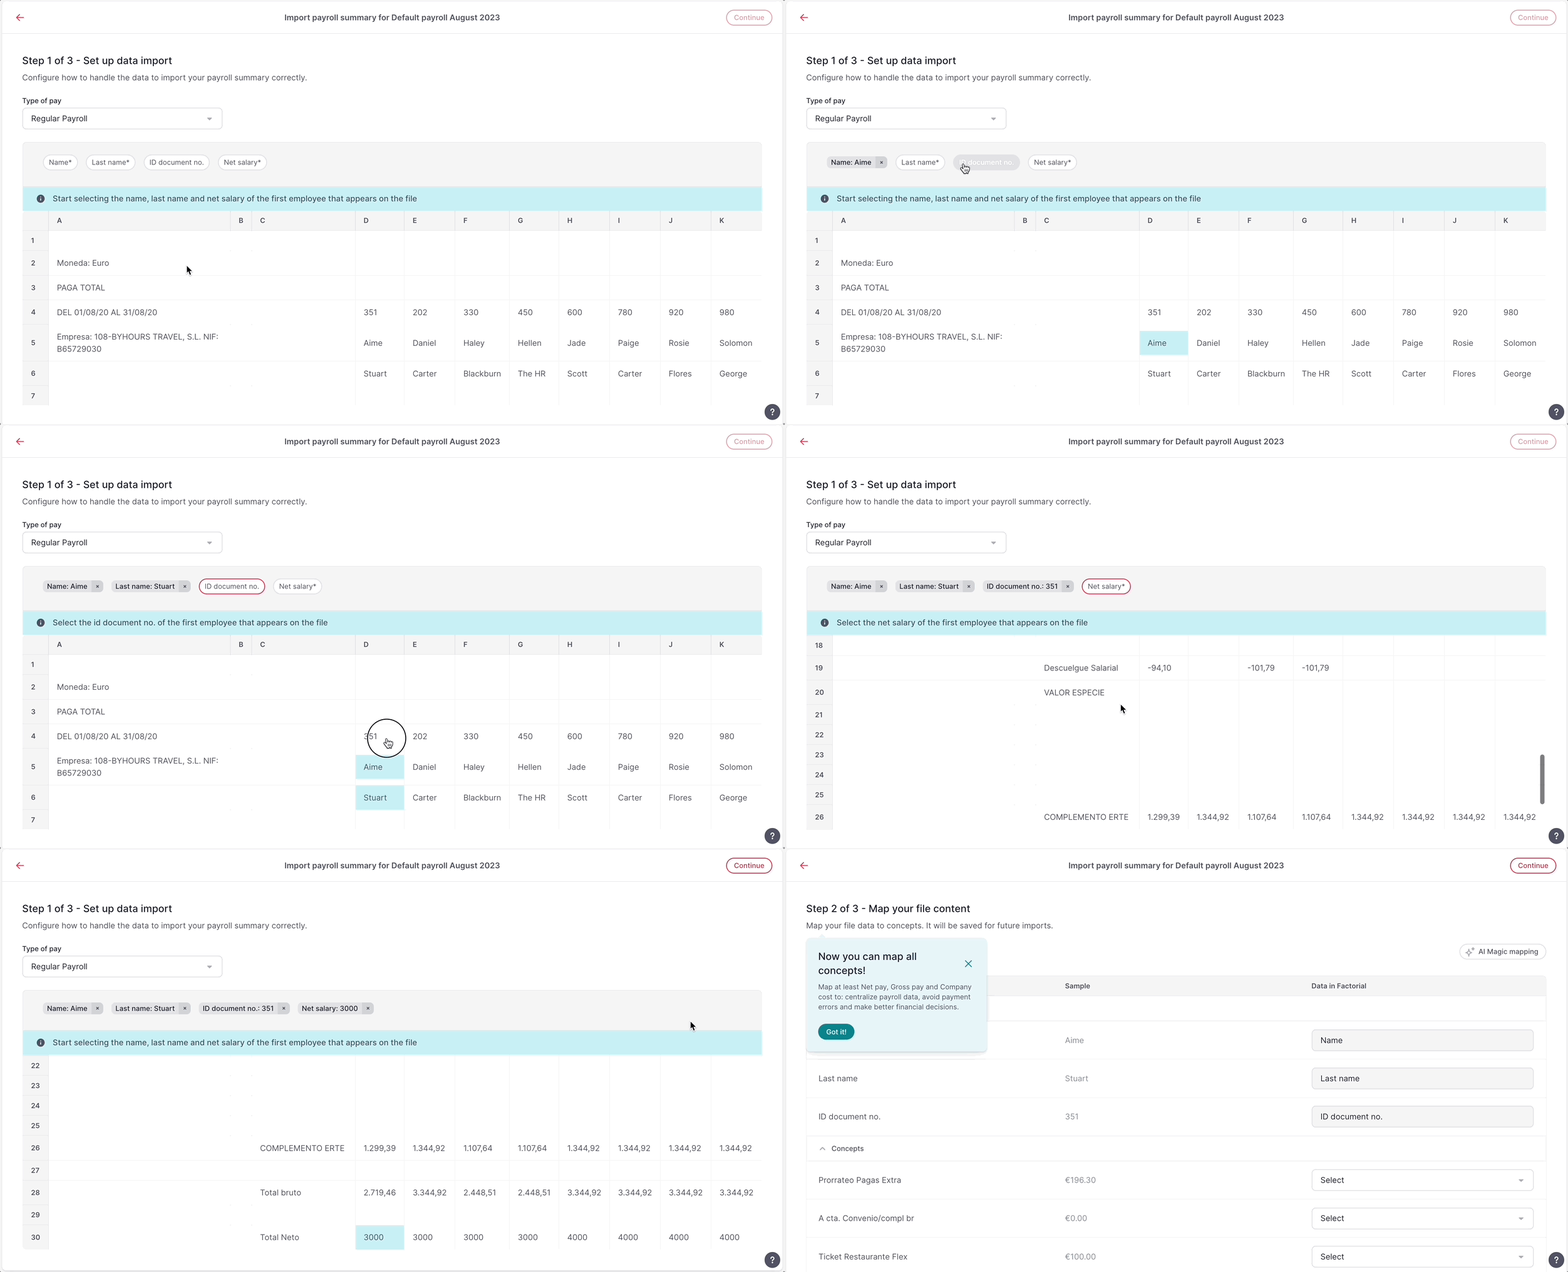
Step 1:
- Select the Type of Pay from the list
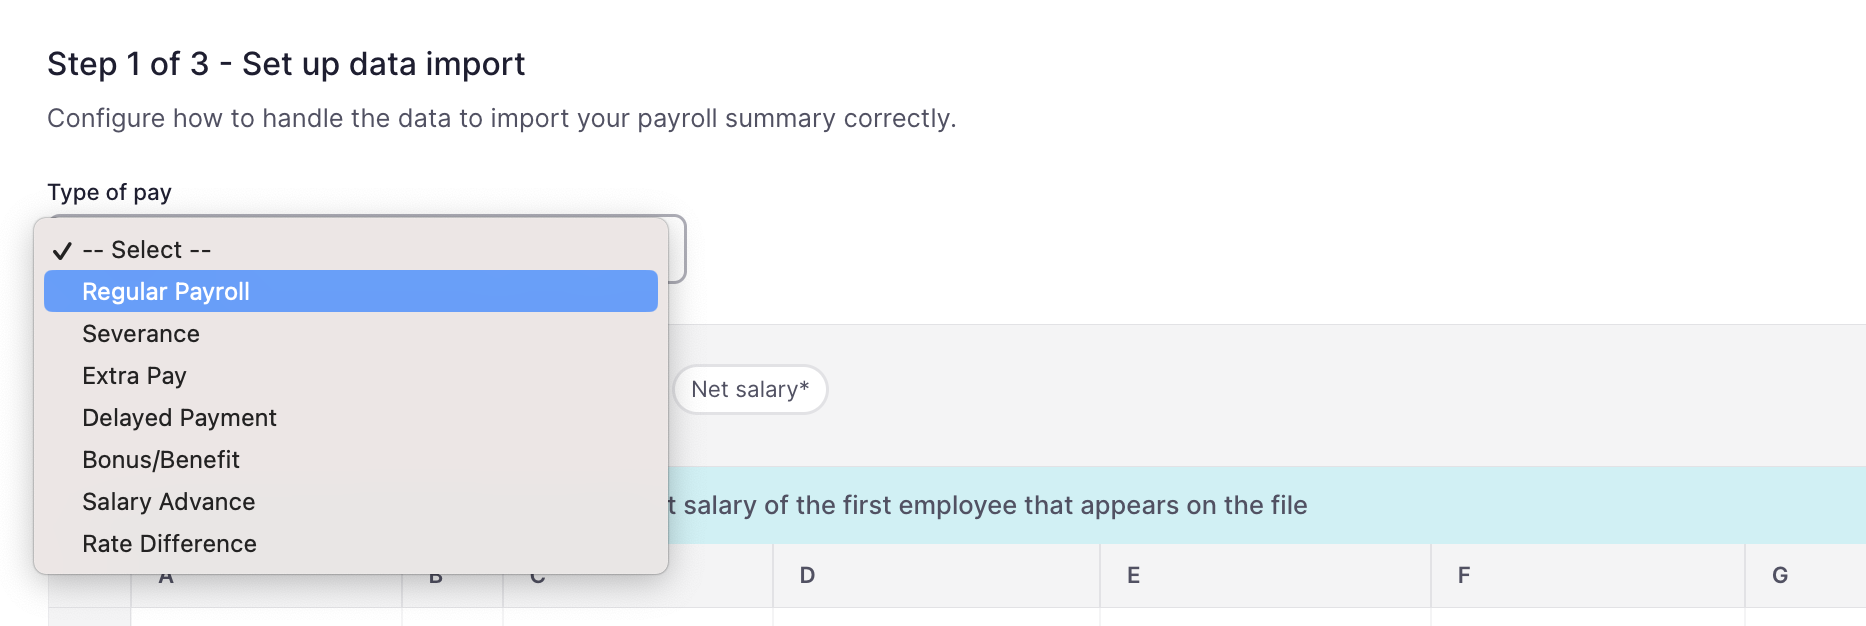
2. Select at least the 3 mandatory fields (Name, Last name, Net salary) from the first employee that appears on your file
3. Click on Continue - in the upper right corner
Step 2:
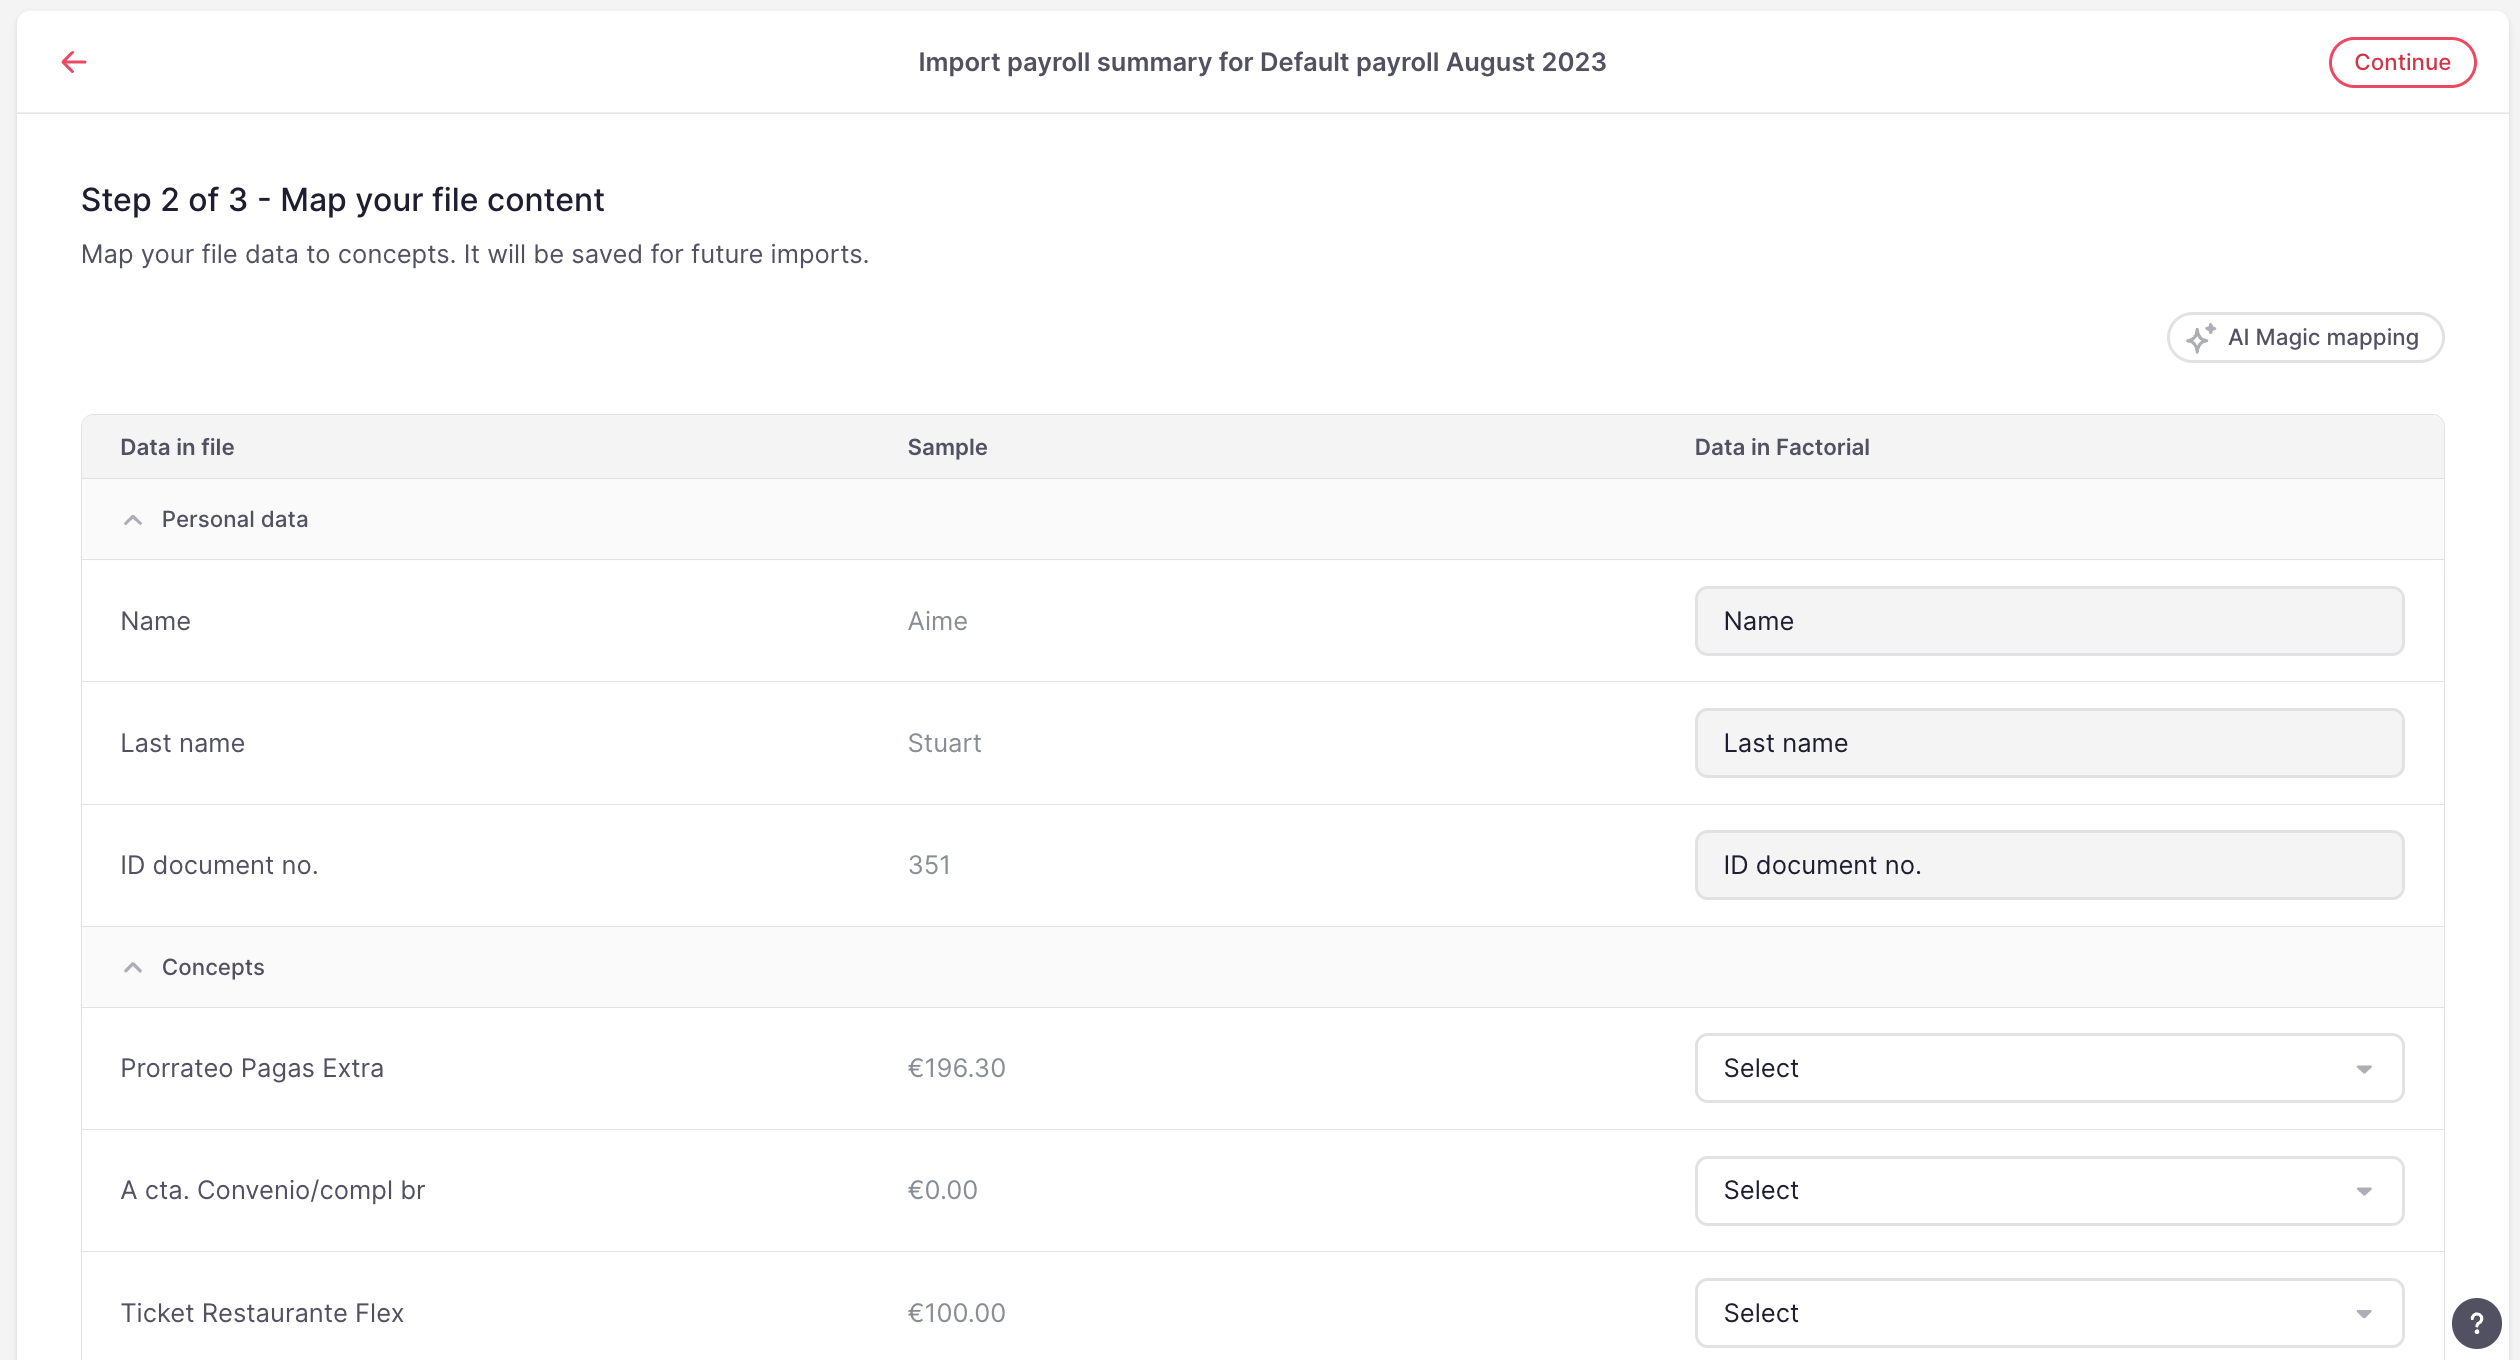
💡 Now is time to map your file content!
A table with the information of your payroll summary will be presented, and it will contain:
- Data in file
- Sample
- Data in Factorial
Time to map the content
- Select a concept in Factorial for each data in your file.
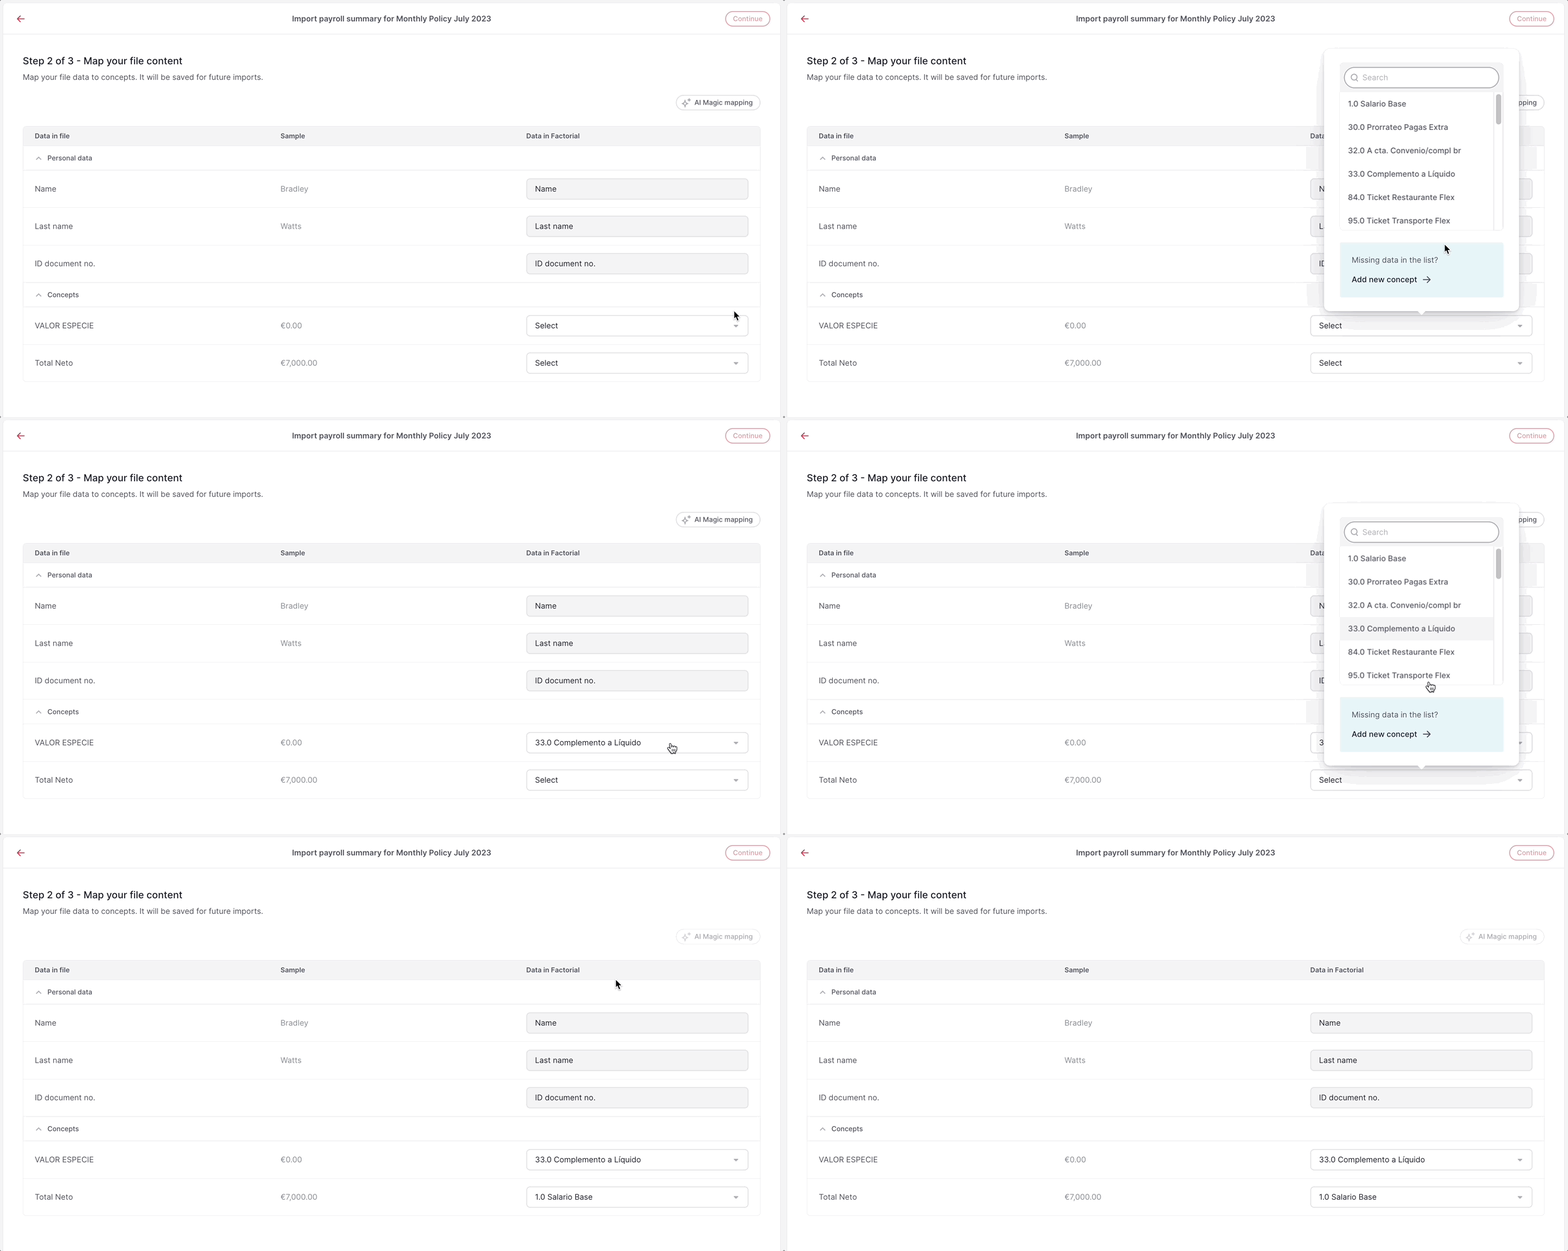
💡 You can automate the process by using Magic mapping: an AI-based mapping system. It automatically maps the matched concepts.
Here's how you can use it:
- Click on AI Magic Mapping located at the top right corner
- The system will automatically map the matched concepts for you
❗Keep in mind that this mapping will be required just the first time, next times it would be mapped as the first time and you just need to validate and make sure the data matches your file.
💡 If you don’t find the concepts you need you can create new ones without interrupting the process:
- Click on Select
- Go to the blue call-out
- Click on Add new concept
- This will open a modal with a text field. Enter the value and submit to create the concept and assign it to that data
-gif.gif)
When all the concepts you want to map are assigned, click on Continue
Step 3:
💡 Time to check and review the imported data
- You can scroll down the employees name, being able to see all the columns created.
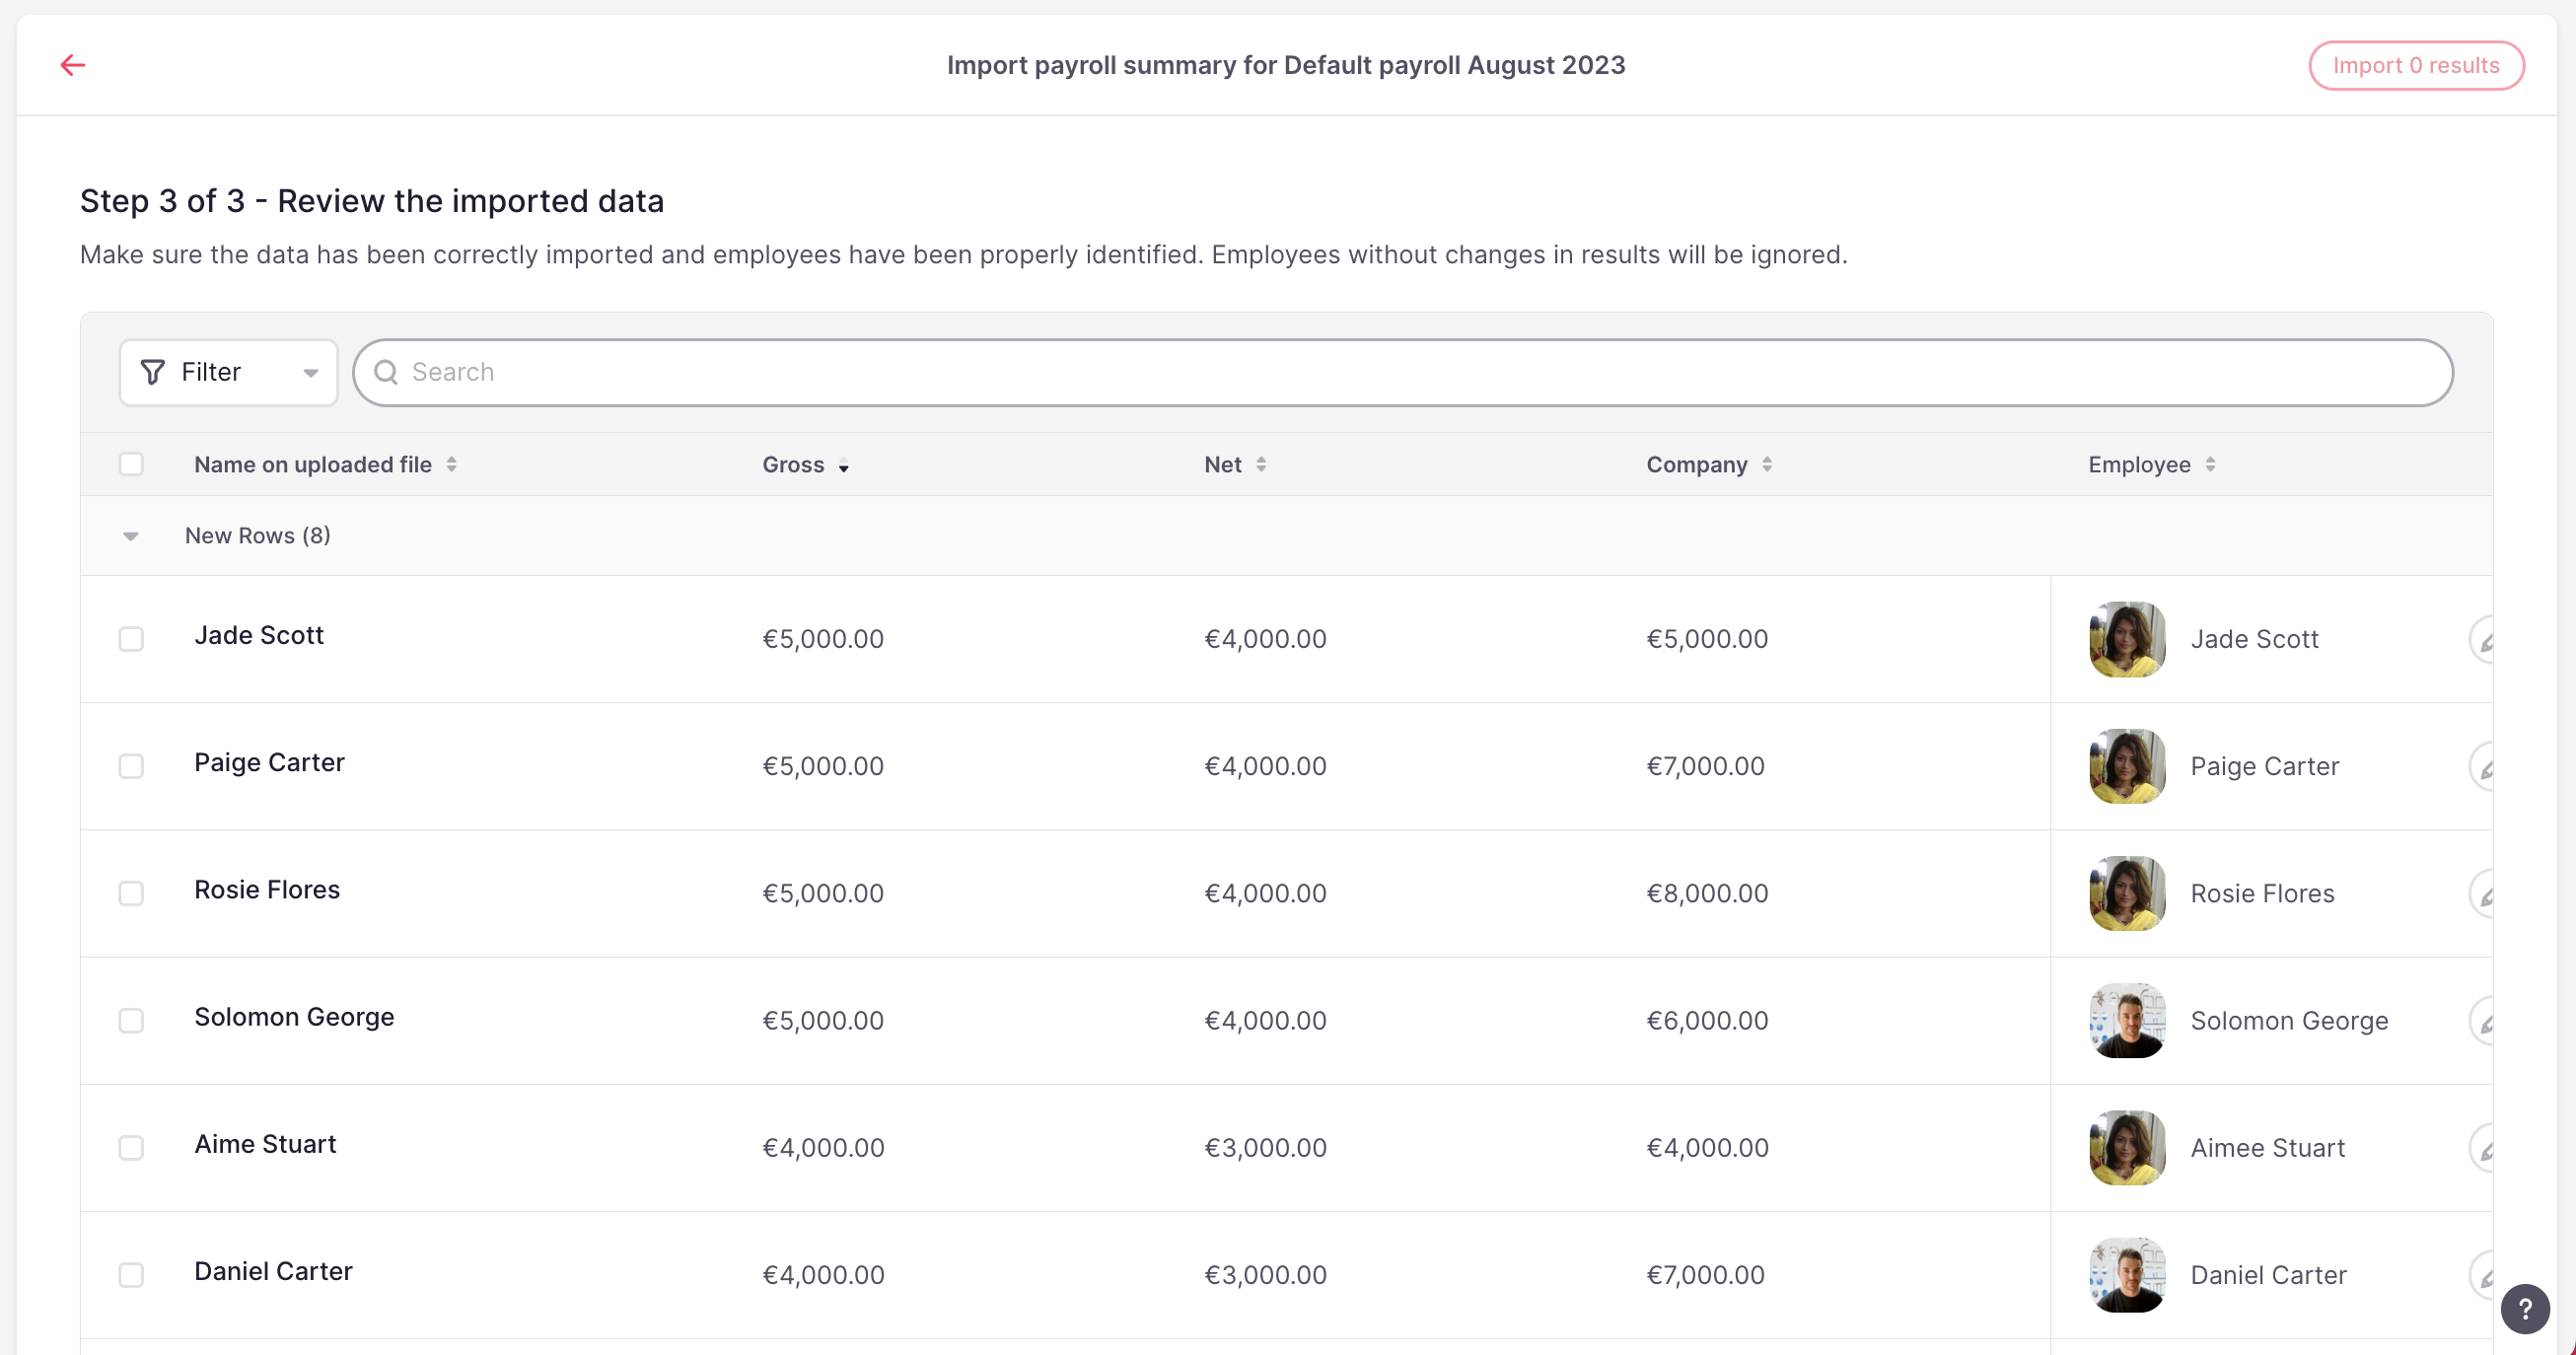
❗If the system doesn't recognize the match among the employees, you will need to match them manually.
After checking that the data is correct it is time to import the results.
- Select the results you want to import
- Click on # Import results
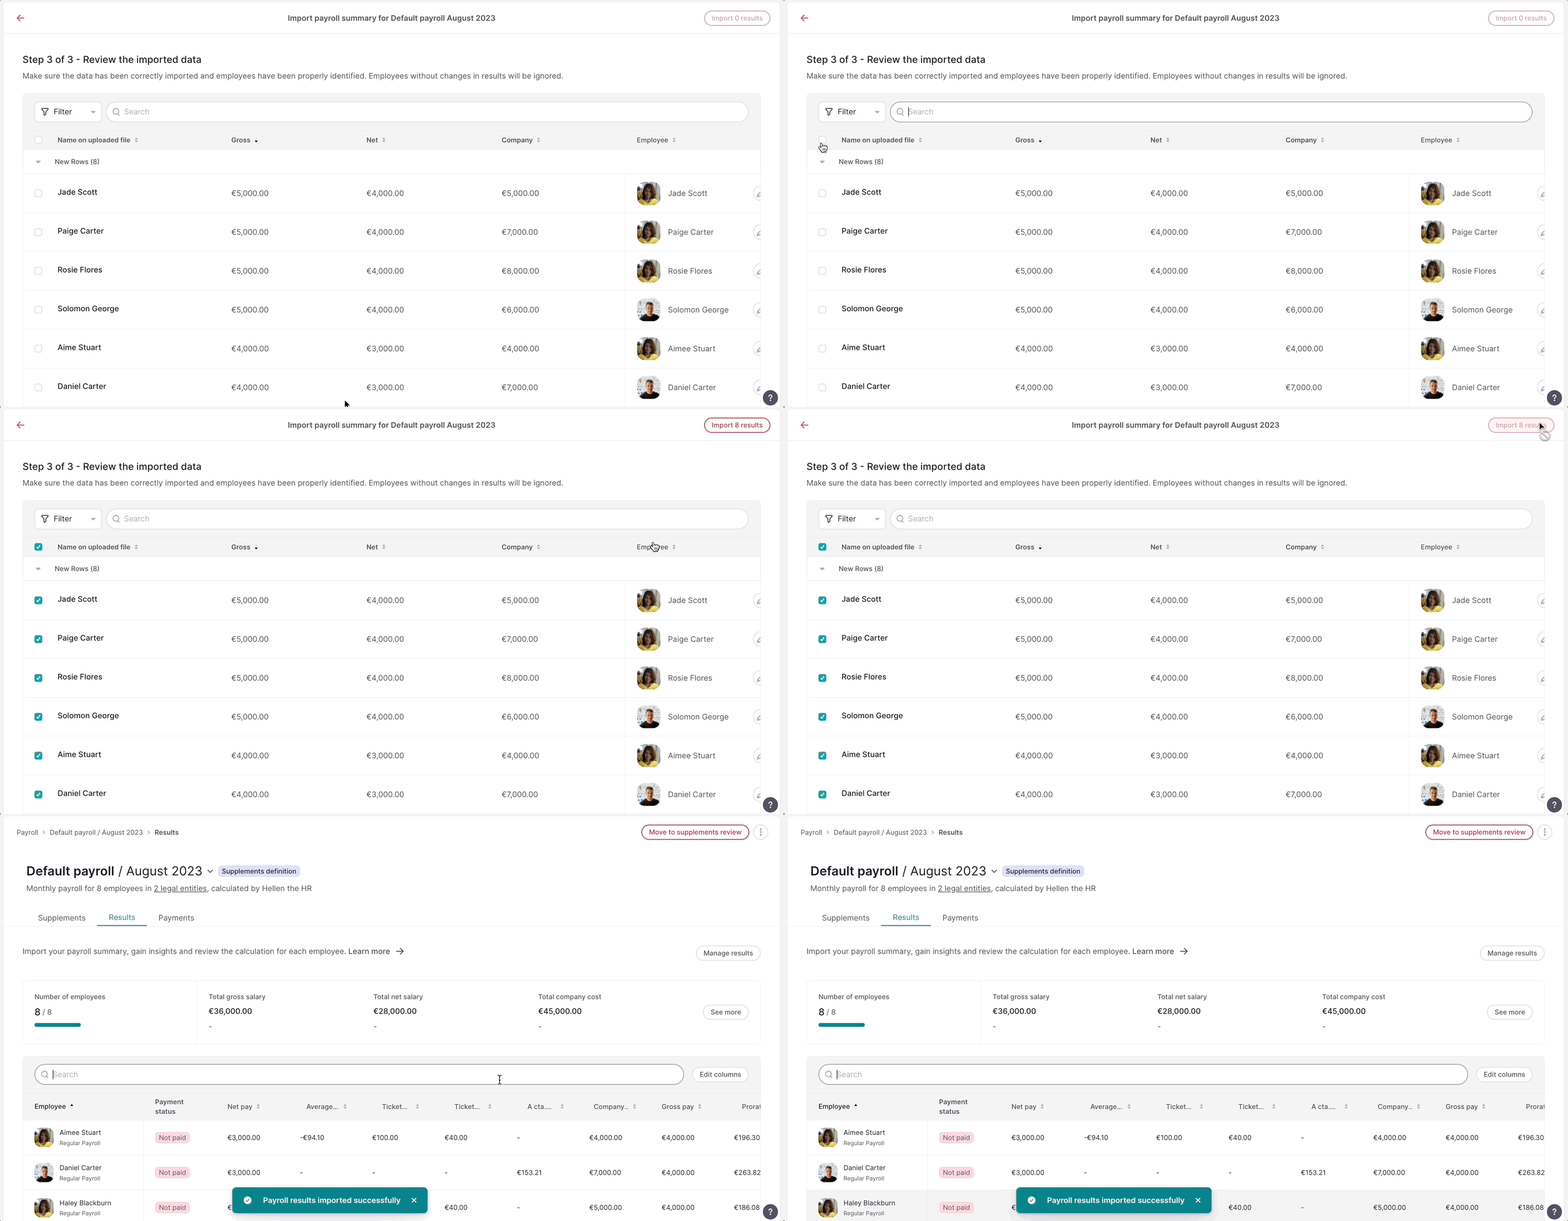
💡 Once that you have imported the results a tab will appear with the amounts.
You will be able to see total by employee:
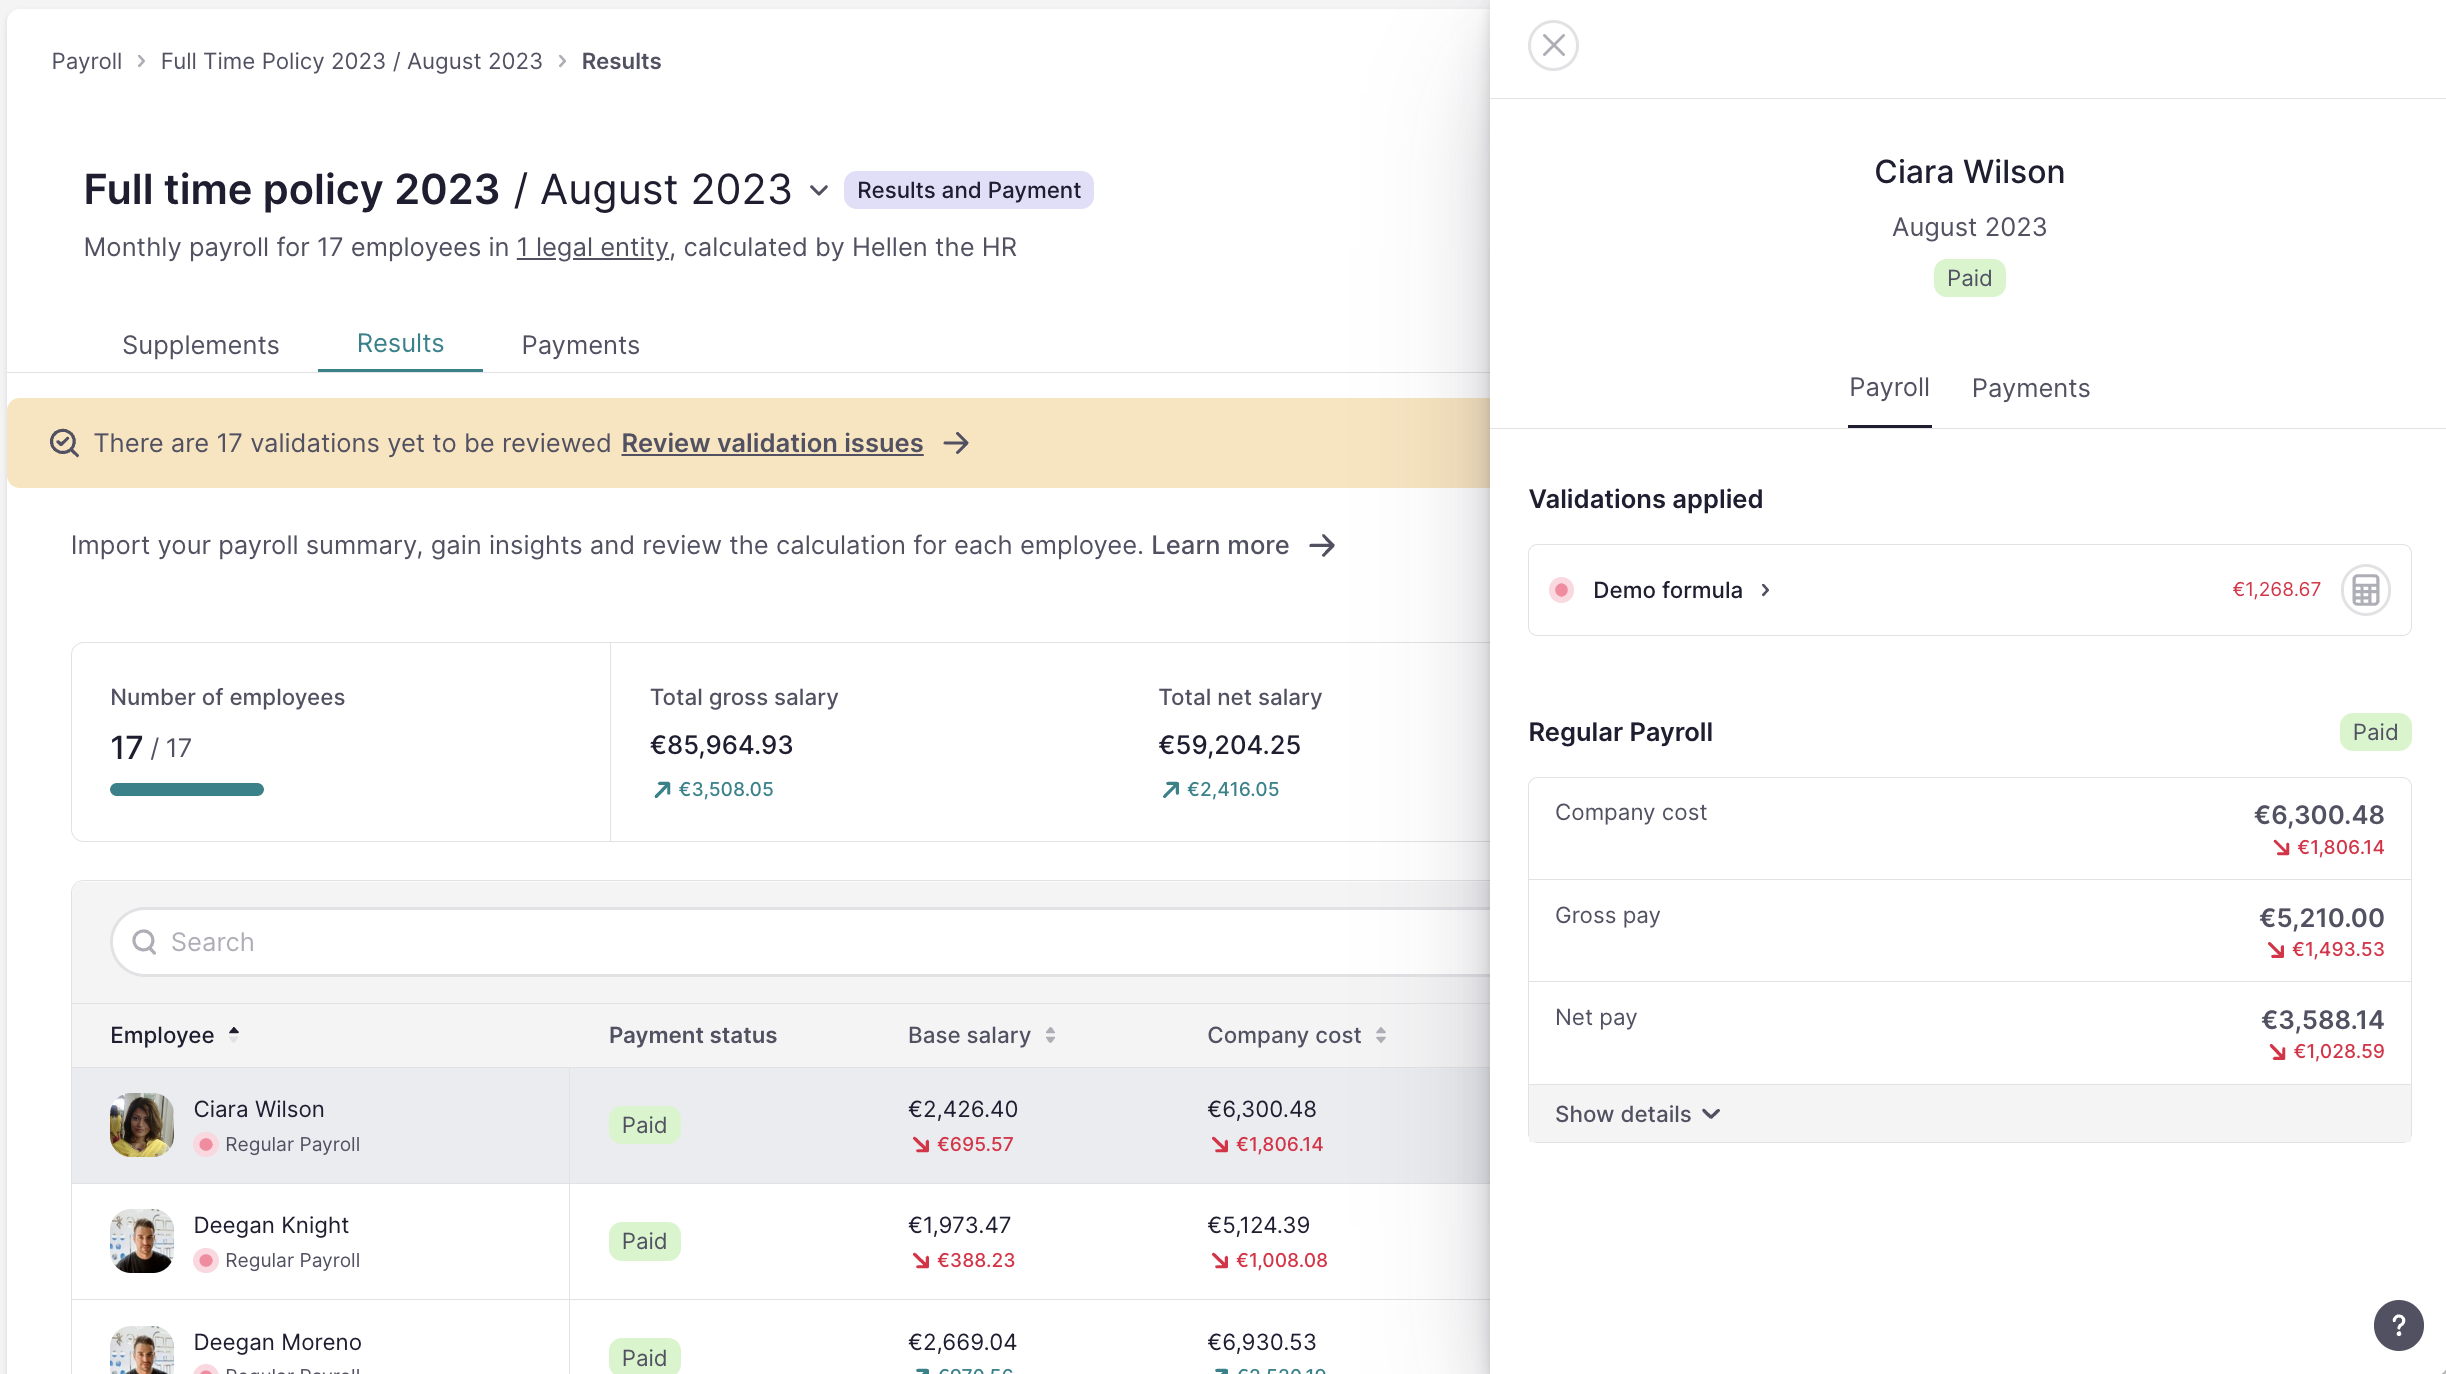
How to validate the data?
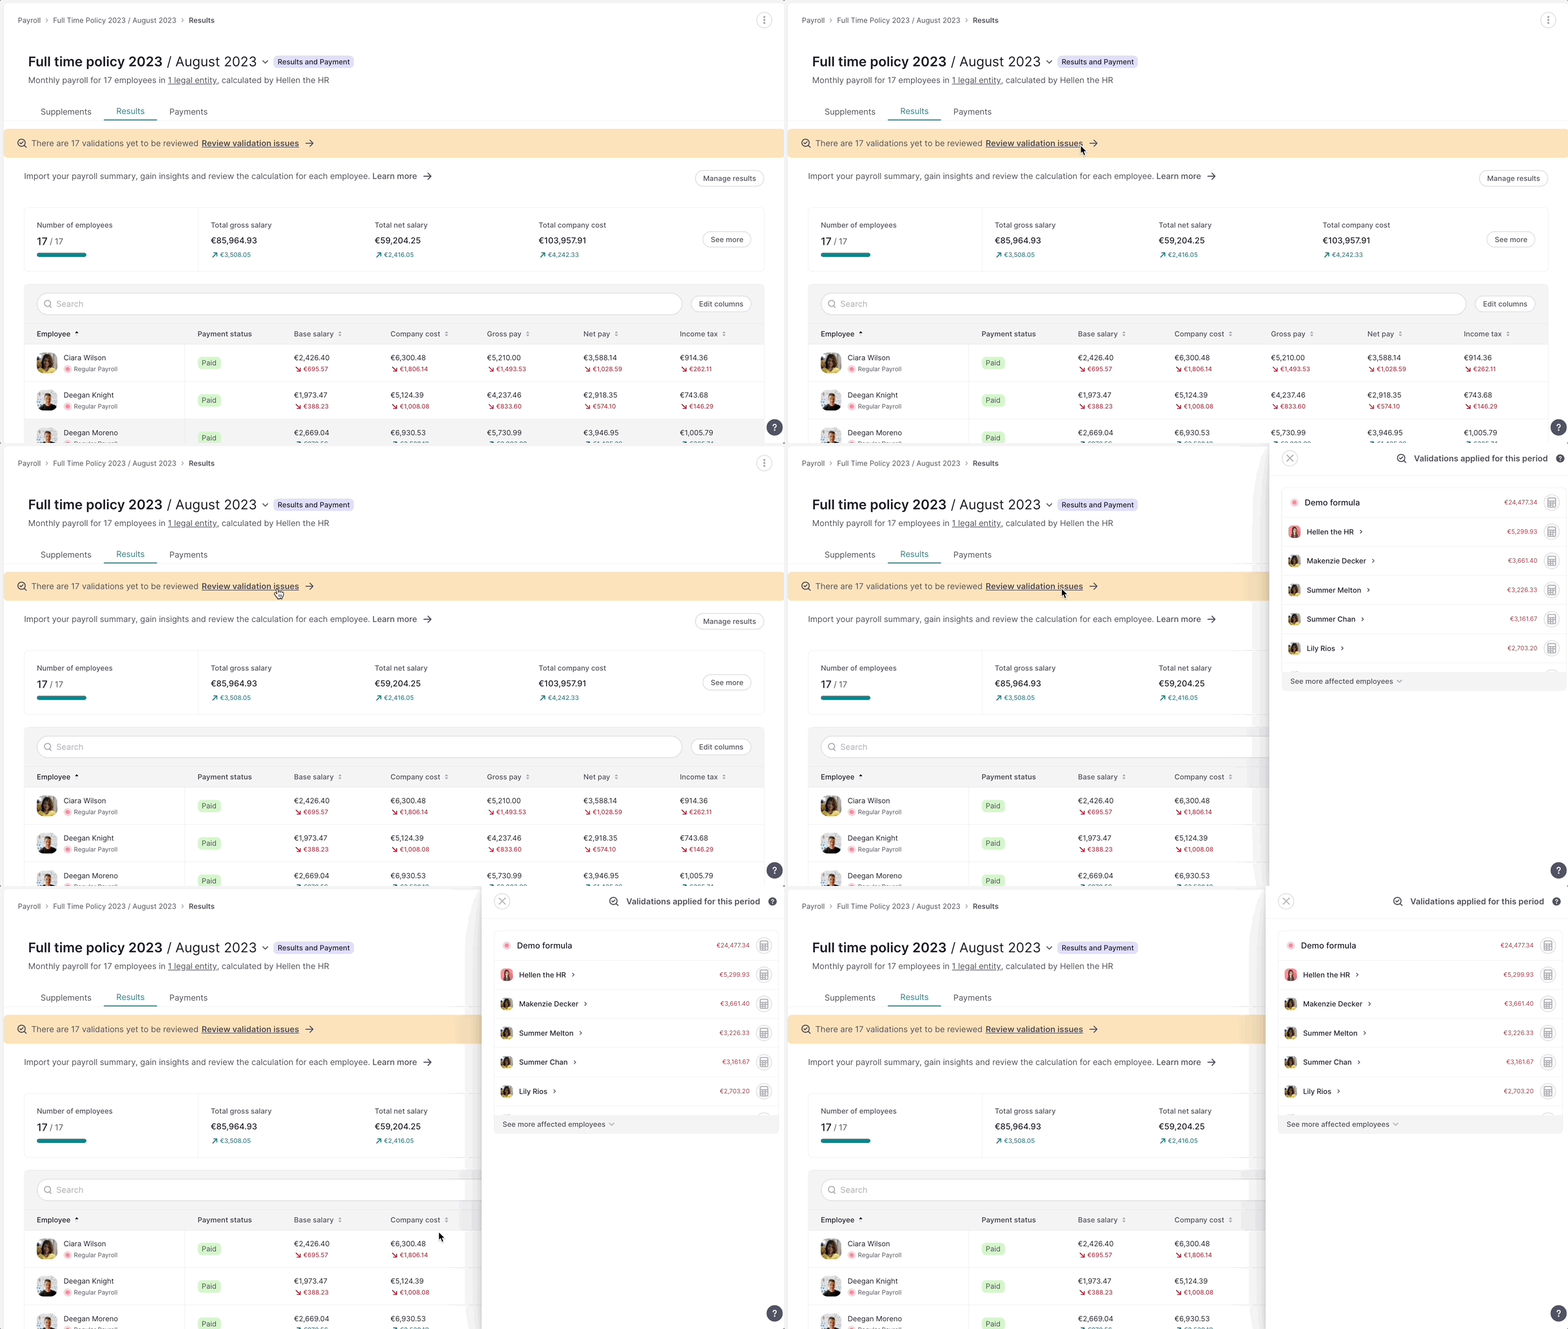
When in Results, a call out will appear with the validation issues.
❗Validation issues appear only if you have any predefined. If you don't have any and you are interested in having custom validation formulas, you can ask your account manager.
- Click on Review validation data
- A side panel will appear with the issues
- Review and check the issues: in the side panel, you can navigate to each employee to delve deeper into the issue. This way, you can gain a better understanding of the root cause of the problem.
How to manage payroll results?
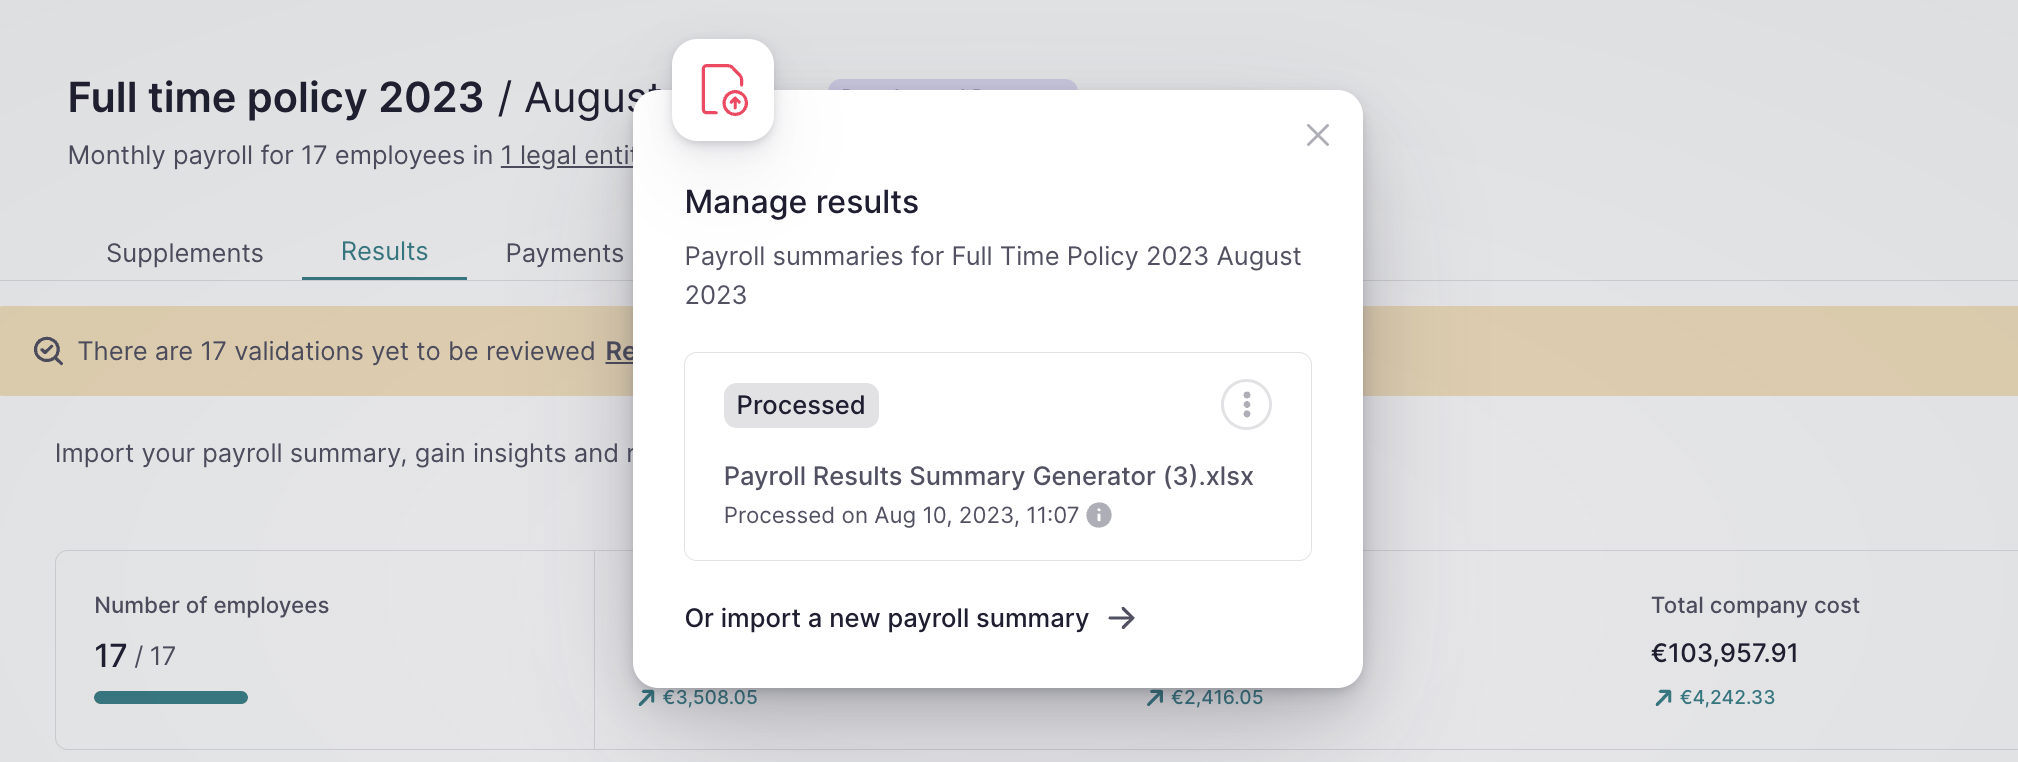
- In the Results tab, click on Manage results
- A list with the files you have processed will appear
To undo processing the results:
- Choose the file you want to undo processing
- Click on the 3 dots located on the right
- Choose Undo processing
